Review (and some howto) – Synology DS411J NAS
For quite some time I’ve run my main PC as a hybrid workstation and server. When I built the machine (over 5 years ago) I got a fancy motherboard with onboard RAID5 and popped in 4x300GB drives. It got a mid life upgrade to 4x750GB (which gave a usable 2TB volume), but that was bursting at the seams – time for an upgrade.
I’d looked at NAS appliances a few times over the years, and the economics didn’t seem to stack up. This time things were different, especially once I factored in energy costs. I considered devices from Netgear, Qnap and Thecus as I shopped around, but eventually settled on the Synology as it appeared to be the best performance for the money. With 4x2TB drives and shipping the whole lot came in at just over £500, and once set up as RAID 5 I get 5.34TB of storage, so it breaks the £100/TB barrier.

Setup
Formatting 8TB of disk takes a long time – think an entire day rather than a cup of tea. Once that was done it was another full day of data shifting.
Performance
CIFS write speed seems to be in the region of 30-35MB/s – good, but not great. Read speed is probably somewhat better, but I’ve not made a serious attempt at measuring it. Subjectively it’s slower than the onboard RAID5 on my PC, but not frustratingly slow. Of course I could have spent more to get better speed.
Getting symlinks to work
The NAS creates a bunch of default mount points for media, but these didn’t fit into the naming convention I’ve used over the years, so I wanted to create symlinks to the actual content in the place I’d chosen. Luckily the box allows login via SSH, but it turned out not to be a simple case of ‘ln -s …’. After a bit of digging around it turns out that the trick is to use ‘mount –bind’ instead, so I created an rc.local with:
mount --bind /volume1/media/audio/mp3 /volume1/music
mount --bind /volume1/media/video/divx /volume1/video
mount --bind /volume1/media/images /volume1/photo
After a re-index I could then see stuff via the DNLA media server on the kids XBox360.
NB It wasn’t necessary to restart the box (as I’ve seen in some instructions). I just had to run the rc.local script after creating it (and chmod +x).
Getting it going with my old Kiss DP-600
The DP-600 is nominally a UPnP device, but that’s a standard that’s even looser than DNLA, and it wasn’t seeing the built in media server. Some quick googling revealed that I needed kissdx. This first involved installing the package manager IPKG, and then a simple ‘ipkg install kissdx’. After a bit of config I was finally free of EZLinkNG.
Overall
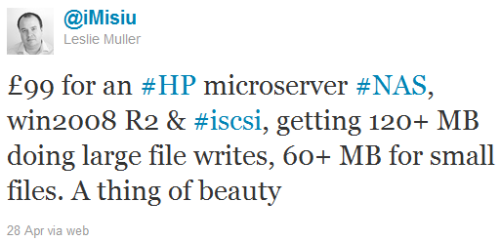
A day or two after getting the DS411J a friend tweeted:
 This made me almost regret buying the DS411J, but not enough for it to end up on eBay. I ended up buying an HP Microserver too, but that’s a story for another day. The bottom line is that it’s a great little appliance – small, quiet, frugal, and fast enough.
Filed under: howto, review, technology | 3 Comments
Tags: DNLA, DP-600, DP600, DS411J, Kiss, mount --bind, NAS, RAID, rc.local, symlink, Synology
Running DS411J:
Software version: DSM 4.2-3211; Build Date : 2013/04/18
Upload speed (Write Speed) 34MB/s
Download speed (Read Speed) 64MB/s
4 drives all Seagate ST4000DM000 4TB 64MB Cache.
Volume 1
Type : Synology Hybrid RAID (SHR) with data protection of 1 disk
fault-tolerance.
File System: ext4
Capacity 10.73 TB
Used: 1.2 TB
I have 4 Seagate ST4000DM000 4TB 64MB Cache.
All cables are CAT 6
Router : D-Link DGL-4500
It’s nice to know that the bigger spindles work in there. Mine is starting to reach that point where I’m thinking about an upgrade. Hopefully it will last until the 4TB drives hit the TB/$ minima presently occupied by 3TB parts (which probably leaves me waiting until 5TB hits the market).