Recovering my Azure VM
A few weeks back I wrote a howto that utilised the 90 day free trial on Azure to build OpenELEC for the Raspberry Pi. Days later my account was disabled as I’d exhausted the (rather low) limit for I/O within the trial. Since I’d only used 5-6p of extra stuff I went through the process of allowing my account to be billed for use over the trial. This didn’t bring back my VM (and there was nothing obvious that I could do to resurrect it). I wondered if things might change if I left it until the second month of the free trial, but nothing did.
Getting the name back
I noticed pretty much straight away that I couldn’t create new VMs with the DNS name that I’d used – openelec.cloudapp.net. Eventually I tracked down the hold on it to the Cloud Services tab. I’d not used this as part of the configuration process, but that’s where I found my orphan name. I had to delete the name, and then create a new VM that used it, as there appears to be no way to attach a VM to a name sat in the Cloud Services list.
Reattaching to old storage
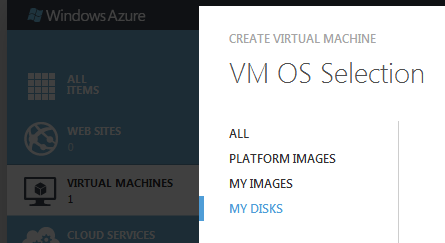
The disks for my VM were left alone when the VM itself was deleted, so it was fairly easy to get things back (once I figured out how). All that’s required is to choose existing disks when creating a VM using the gallery method:
Conclusion
When I lay out the steps above it looks trivial, but it took me a lot of poking around the Azure management portal (and a bit of trial and error creating and recreating machines) to figure things out. The extra good news is that Microsoft have upped the I/O limit in the free trial from 1m to (a far more reasonable) 50m, so hopefully I won’t subject myself to economic denial of service (EDoS) again by running OpenELEC builds.
Filed under: cloud, howto | Leave a Comment
Tags: Azure, disk, DNS, Microsoft, MS, name, reattach, recover, recovery, VM

No Responses Yet to “Recovering my Azure VM”