Home brew
TL;DR
I made a hoppy American style pale ale using a Festival Razorback IPA kit. It was easy, and tastes great.
Background
I like beer. I like beer a lot. Over the years my tastes have changed from the mass produced lagers of my youth, to the resurgent British real ale that’s been around for most of my adult life, and now American craft beer. It was probably a decade ago that I started visiting the US pretty frequently, and not long afterwards I discovered that American beer had moved on from Bud[1], Miller and Coors (Lite). Sam Adams was my first taste of the beer revolution, but it was Sierra Nevada that really made a mark on me.
Until last year I was pretty happy to leave American beer styles to my travels, but a couple of things conspired to change that. First and foremost I blame James Governor for introducing me to brews like The Kernel at his excellent Monkigras events; and then Ryan Koop got me going with Revolution Anti-Hero and SKA Modus Hoperandi in the bars of Chicago’s Loop. After returning home from an extended stint in Chicago last summer I found myself unable to appreciate an ordinary British pint. I had become addicted to hops.
Of course it’s possible to get hoppy IPAs and the like in the UK. Imports like Goose Island Green label are readily available, and there are plenty of domestic clones such as Brewdog Punk. The trouble is that they’re expensive – typically around £1.79 for a 330cl bottle. I mostly settled in to getting bottles of Oakham Citra from Waitrose – still £1.79 a bottle, but for a half litre. I’d also treat myself to bottles of Dark Star brews or some draft HopHead from my local boutique vintner.
The craft in craft beer
I’d met Elco Jacobs, the man behind Brew Pi, at Monkigras 2013, and we’d swapped notes on temperature control using Raspberry Pis. So I had some idea what would be involved. I’d also brewed some (terrible) ginger wine as a teenager. I figured that if I wanted to drink craft beer then I should get on with the craft. A quick chat with Jim Reavis at a Cloud Security Alliance event persuaded me to take the plunge.
Start easy
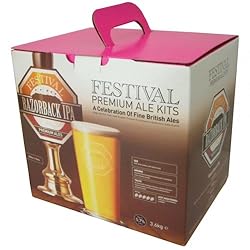
I decided to start out with a kit. My initial idea was to get a basic IPA kit, and then hop it up a bit, but then I found the Razorback kit and that seemed like a quick path to what I wanted. I bought the beer kit along with a comprehensive equipment starter kit[2] from Balliihoo.
The brew
After sterilising all the bits of equipment I was about to use it was pretty easy to get the kit going. I just dissolved the sugar pack and the pack of beer goop in hot water, put it into the brew bucket and added cold (filtered) water, stirred, added the yeast and sealed the lid.
The wait
Nothing happened.
For days my beer just sat there.
Not so much as a bubble from the air trap.
I thought my fermentation might be stuck.
Or maybe I’d killed the yeast by putting it in when the wort was too hot (even though I’d checked the thermometer on the side of the bucket).
And then finally after about a week it frothed up.
Dry hopping
After a couple of weeks I decided to take the plunge and add in the hops pack and test the gravity of my brew. It had gone from 1048 to 1012 – good progress.
More wait
Brewing needs patience. I left it alone for another couple of weeks, and it continued to show no external signs of anything happening.
Another gravity test showed 1005. First fermentation was finished.
Kegging
The auto syphon I’d seen recommended as an addition to the base equipment kit really came into its own here, and made the transfer to the keg very easy.
Yet more waiting
About a week for secondary fermentation to happen, and then another couple for conditioning and clearing.
At last
I have beer. It’s very nice straight from the keg. Nicer still if I decant some into a bottle and let it chill in the fridge. Properly awesome if I give it a quick fizz in the SodaStream before drinking[3]. It’s a little cloudy compared to commercial beers, but the important thing is that it tastes great.
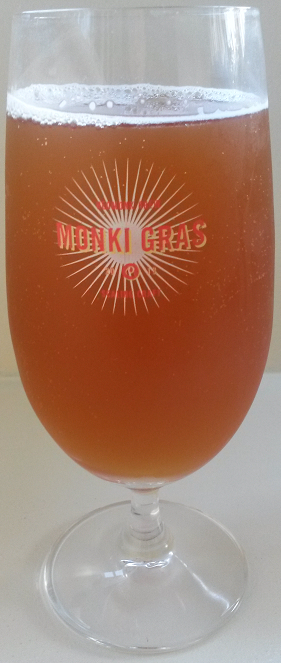
My brother and I did a quick comparison against some HopHead last night, and we both actually prefer the floral notes on the home brew. My 40 pints might not last as long as I’d originally planned, so it’s a good job that I have another brew going on tonight.
ToDo
So far I haven’t turned my beer project into an electronics or Raspberry Pi project. That will come in time. I fully intend to make a brew fridge once I start to stray from just using a kit (and as the winter months necessitate some better temperature control).
Any tips welcome
I’m new to this, so please comment on what else I should be doing/trying.
Notes
[1] Back when I was in HMS London I used to be the ‘wardroom wine caterer’ (== booze buyer). For a NATO Standing Naval Force Atlantic deployment I went for a policy of buying local. The 50 cases of Labatts Ice I got in Halifax Nova Scotia went down very well, the 40 cases of Bud I got in San Juan not so much.
[2] I’ve still found no use for the funnels that came in the kit.
[3] Careful use of a SodaStream (I have a Genesis model) adds some extra fizz and hasn’t resulted in the mess that most forum posts warn about – like everything else with this brewing malarkey the main trick seems to be taking things slowly and carefully.
Filed under: beer | 10 Comments
Tags: APA, beer, brewing, craft, Festival, home brew, IPA, Razorback
Subscribe
Recent Comments
Tim Coote on Ross Anderson RIP iain on Skiing in Espace Killy (Val… Chris Swan on Getting more from a British Ga… Murray Cowell on Getting more from a British Ga… JL on AI MacGuffin  Pinboard.in bookmarks
- Open Source Security (OpenSSF) and OpenJS Foundations Issue Alert for Social Engineering Takeovers of Open Source Projects
- AI isn't useless. But is it worth it?
- Pluralistic: The true post-cyberpunk hero is a noir forensic accountant
- Subaru battery drain due to missing 3G network
- Paying maintainers: the HOWTO
- SARS-CoV-2 airborne infection probability estimated by using indoor carbon dioxide | Environmental Science and Pollution Research
- An unbiased evaluation of environment management and packaging tools
- Computer says no: British judge refuses to cancel divorce resulting from computer mistake
- Philosophy Museum
- Royal Navy offer must improve to attract and retain staff – you can't motivate an empty chair


Nice!
40 Pints! American or Imperial Pints? ;-)
Imperial :)
Chris, its a little cloud for one of 2 reasons. You haven’t left it long enough to condition, you want 4-6 weeks really and thats at cellar temperature. If you are storing it somewhere warmer it takes a little longer to clear.. It can also go cloudy due to temperature shock when you put it in a cold fridge from warm.
Thanks Simon. I knew that I could have been more patient on the conditioning (and that it would help if I had somewhere cooler to keep it)
You could also use finings to clear it down.
Hi there!
I have a question… I’m waiting for the same RAZORBACK IPA beer…. but in 2 weeks fermenting I still watching all this sediments up in the beer, don’t really see any of movement of the yeast….and my test gravity for today is 1.001 the original Gravity was 1.046…. can this be correct?
I just need to wait more time, and wait for all the top sediments go to the bottom of my Bin?…. this is the first time I made this brand and is the first time too, that take me a lot of time……I’m worried about the final gravity…. because now is on 1001… is that normal?
Sorry for my Crappy english…
I don’t even put the hops inside… I need to wait for the sediment to leave the top, no?
Hope you can reply!
Cheers!
Don’t expect it to clear at this stage. Your finishing gravity shows that first fermentation is done, but you need to do the hopping before keggin and second fermentation.
Don’t expect the beer to clear until after second fermentation, and try to get it somewhere cool to help that happen.
I’m really don’t care about the clearance of the beer, I’m worried about:
1) There is a lot of foam in the beer!, that’s normal?
2) I never brew a beer that get close to final gravity to 1.001 this number make me fell so scary about the final taste…. anyway smell good, like pine….
3) I think the fermentation is over but i still see all this foam so,do you think I need to transfer the beer to a second bin?….to add the hops even if it has all this foam?
Sorry for all the questions…. but I usually brew other kits that in some days stop fermenting and the foam disappear ……this is the first one that get’s
alot of foam on the top and still there after 11 days.
What is your recommendation?
I’m doing my third Razorback now, and the foam is normal. Don’t worry about it. Just get the hops in, and move it to a keg for second fermentation after a week or so of hopping.
Thanks for the reply Chris!… Cheers Mate!