Retro Computing – TMS9995 on RC2014
I already wrote about my plans to get a TMS9995 running on RC2014, so this is the post about how I put together an RC2014 version of Stuart Conner’s TMS 9995 Breadboard or PCB System.
Planning
Taking a look at the TMS9995 pinout and the RC2014 module template it became clear that there was no easy way to place the CPU that would align well to the address bus, so I chose a position to one side of the module that lined up the clock pins and made the data bus reasonably easy. That placing also meant that I had plenty of space for the TMS9902 based serial port.
Pinout
I went with the following mappings
TMS9995 : RC2014
A0-A15 : A15-A0 (as TI convention for numbering is reverse of industry norm)
Vss : GND
Vcc : 5v
NC : M1
Reset : Reset
CLKOUT : Clock
NC : INT
MEMEN : Mreq
WE/CRUCLK : Wr
DBIN : Rd
NC : IORQ
D7-D0 : D0-D7 (same reversal as address bus)
CRUIN : USR1
Parts
This whole thing came about because I found a stash of TMS99xx chips. So I already had the TMS9995 CPU, and TMS9902 asynchronous communications controller. I also knew that I’d be able to use my existing RC2014 RAM and ROM modules. With some 74LSxx TTL chips and pull up resistors on hand, all I needed were some sockets, a crystal, and a couple of capacitors, which I ordered from Bitsbox (rather than lots of little eBay orders).
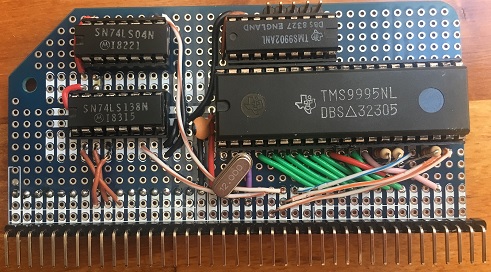
The whole thing went onto an RC2014 prototype module. I chose to put the CPU and serial together on one module (as I only had one lot of right angle edge connector).
Clock check
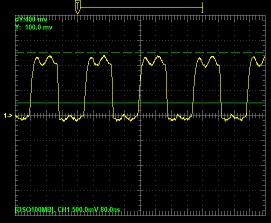
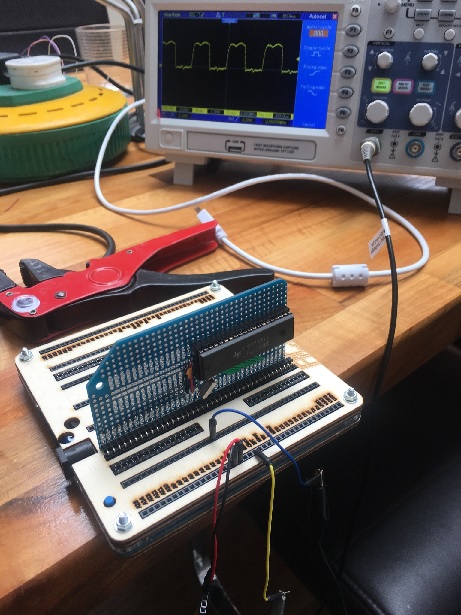
Before getting too far into the build I checked that I could get a 3MHz clock out of my TMS9995 on breadboard:
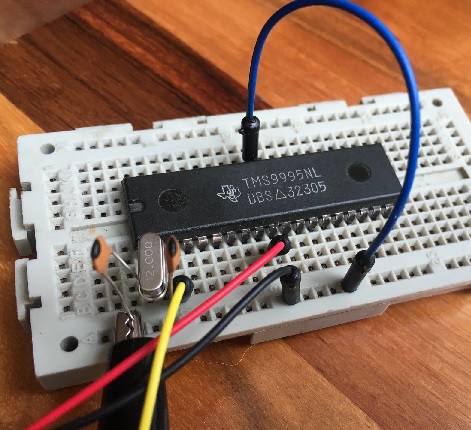
All was well:
Construction
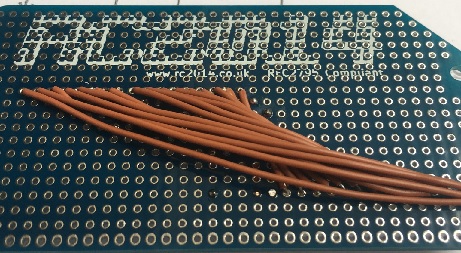
I knew that the address bus would be tricky, so I got that out of the way first:
Next up was the data bus and clock, which got me to a stage where I could test the clock again:
After that I found space for the serial parts. It turned out that I could mount the TMS9902 right by the CPU to take advantage of its use of A10-A14 with some simple bridges. The 74LS138 also sat nicely in reach of A7-A9 using the space remaining over the power lines. That just left me needing to place the 74LS04 inverter for CRUCLK (which Stuart told me was needed after TI changed things between the TMS9900 and TMS9995)[1].
Here’s the finished board from the front:
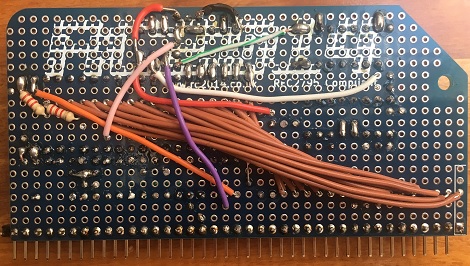
and the back:
It didn’t run first time :(
and it took me ages to track down the short between A9 and the /CE on the 9902. Eventually I realised that Stuart’s debug test images were working without the 74LS138 at which point I found the bug.
I then had the delight of running Stuart’s third test image and seeing a screen full of ASCII characters :)
ROM wrangles
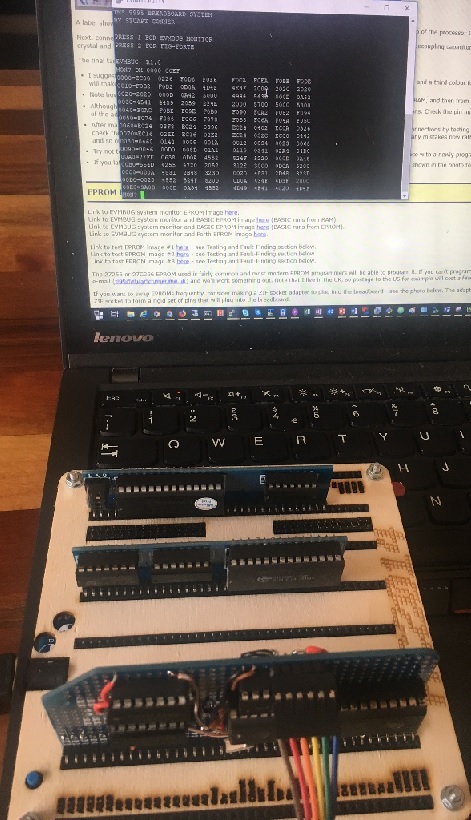
I expected Stuart’s 32k images with EVMBUG and BASIC/FORTH to work in the RC2014 pageable ROM module with the jumpers set for a 32k page size and A15-0 for the lower page, but that hasn’t worked for me.
I have however succeeded in getting EVMBUG running from the switchable ROM module, which allowed me to run HELLO WORLD from the monitor:
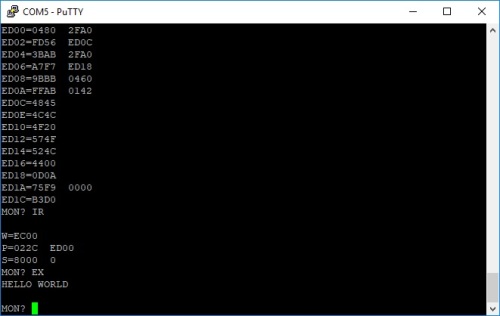
I suspect I’m going to have to knock up my own 32k ROM module to get BASIC working
Conclusion
I’d have liked to try Cortex BASIC, but getting HELLO WORLD running from the monitor will have to do for now.
Next post: Retro Computing – BASIC and Forth on RC2014 TMS9995
Note
1. It seems that a couple of the TMS9901 that I have are the -95 versions that should work with a TMS9995 without inverting the CRUCLK, but none of the 9902s :/
Filed under: RC2014, TMS9995, Uncategorized | Leave a Comment
Tags: RC2014, ti, TMS9902, TMS9995
Subscribe
Recent Comments
Tim Coote on Ross Anderson RIP iain on Skiing in Espace Killy (Val… Chris Swan on Getting more from a British Ga… Murray Cowell on Getting more from a British Ga… JL on AI MacGuffin  Pinboard.in bookmarks
- Why has Hugh Grant settled his phone hacking claim against the Sun?
- Open Source Security (OpenSSF) and OpenJS Foundations Issue Alert for Social Engineering Takeovers of Open Source Projects
- AI isn't useless. But is it worth it?
- Pluralistic: The true post-cyberpunk hero is a noir forensic accountant
- Subaru battery drain due to missing 3G network
- Paying maintainers: the HOWTO
- SARS-CoV-2 airborne infection probability estimated by using indoor carbon dioxide | Environmental Science and Pollution Research
- An unbiased evaluation of environment management and packaging tools
- Computer says no: British judge refuses to cancel divorce resulting from computer mistake
- Philosophy Museum


No Responses Yet to “Retro Computing – TMS9995 on RC2014”