Building OpenELEC in the cloud
When I got my Raspberry Pi pretty much the first thing I did with it was to put on OpenELEC, and excellent shrink wrapped package for XBMC. Initially I started compiling it myself on a local virtual machine (VM), but impatience got the better of me and I downloaded an image provided by somebody else. Later I did some builds for myself, and as others seemed to want up to date build packages and images I moved my build process to a virtual private server (VPS) to save the time taken uploading large files over home broadband. In this howto I’ll run through getting your own server in the cloud, configuring it to build OpenELEC and serving up images.
If you came here just looking for OpenELEC builds/images for the Raspberry Pi then what you’re looking for is here.
Picking a cloud
The VPS that I’m using at the moment comes from BigV. I was lucky enough to get onto their beta programme, which means that I’m not presently worrying about server or bandwidth charges.
The most popular cloud is Amazon’s Elastic Computer Cloud (EC2). I’ve had an AWS account since before they launched EC2, so I’m a long time fan of the platform. This does however mean that I’ve not been able to benefit from the free usage tier for new users. As a consequence I only use EC2 for temporary things as leaving the lights on runs up a bill.
For cheap VPS machines it’s always worth checking out low end box, but for a build box be careful that you have sufficient resources – I’d suggest at least 1GB RAM and 25GB disk.
Last week Microsoft announced support for Linux on their Azure cloud, and there’s a 90 day free trial, so for the purpose of this howto I’m going to use that.
Signing up to Azure
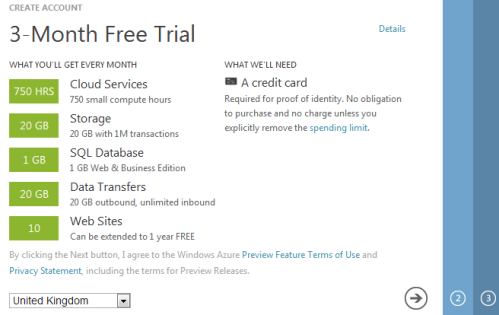
First hit the Try it Free button on the free trial page. You’ll need a Microsoft Live account (aka Hotmail account). I’m guessing many people have these already, but if you don’t then you’ll need to sign up[1]. Once logged in there’s a 3 step sign up process:
I chose not to screen shot my credit card details ;-) There’s also no need to give MS your real mobile phone number for the sign up. I used a Google Voice number (see this past post for how to sign up for GV if you’re outside the US).
Once sign up is done it takes a little while for the subscription to be activated, so you’ll probably see something like this:
Once that’s complete it’s time to get started for real.
Creating a virtual machine
I got taken to the ‘new’ Azure portal and had to click through a brief tutorial. Once that was done I was faced with:
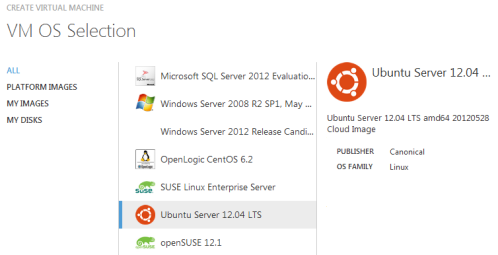
I hit ‘create an item’ then ‘virtual machine’ then ‘from a gallery’ :
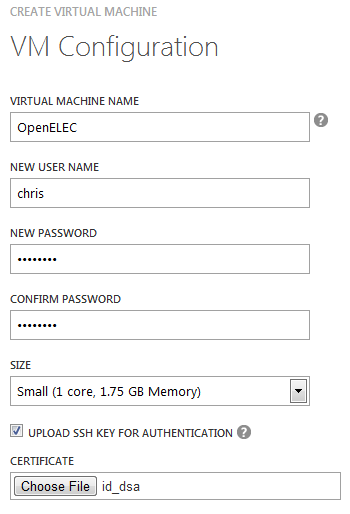
On the next page I filled out the configuration. The SSH piece looks optional, but it’s a good idea to use a key for security, so if you know how to do that then it’s worth using[2]:
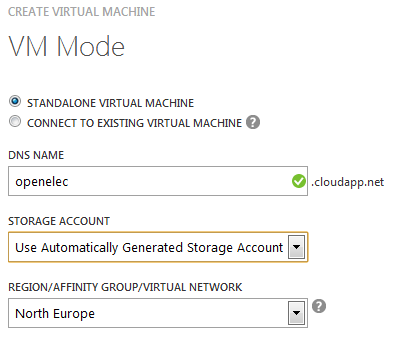
The next page lets you name the machine and choose where it will be hosted. I took the name ‘openelec’, so you’ll have to pick something else – sorry:
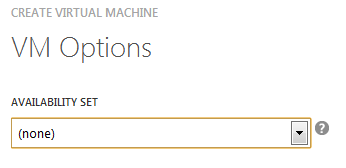
I didn’t do anything around availability sets before hitting the tick:
Once all that’s done it will take a little while to provision the machine and start it:
Configuring the VM
First connect to the VM. I’m using PuTTY:
This isn’t a good start:
So run the update tools:
sudo apt-get update
sudo apt-get upgrade
Next install the dependencies for building OpenELEC from source:
sudo apt-get install git build-essential gawk texinfo gperf \
cvs xsltproc libncurses5-dev libxml-parser-perl
Compiling for the first time
First pull down the source code from github:
git clone https://github.com/OpenELEC/OpenELEC.tv.git
Then start the build process:
cd OpenELEC.tv
screen
PROJECT=RPi ARCH=arm make release
The first time around you’ll need to interact with the build process a little to tell it to download additional dependencies. I’ve added in the screen command there so that you can safely cut the SSH connection whilst the build is taking place. If you need to get back to it later then ‘screen -r’ is what’s needed. Screen really is a great tool for anybody using a remote machine, and it’s worth getting to know it in more detail.
That’s it for now
The first compile will take a few hours. In part 2 I’ll cover automating the build process, and setting up a web server to host the release packages and images.
Updates
Update 1 (22 Jun 2012) – My Azure account was disabled after a couple of days, which turns out to be because the trial only bundles 1M I/Os to storage (or 10c worth per month). On that basis it seems that Azure isn’t a suitable cloud for this purpose. It was a fun experiment, but a trial that only works meaningfully for around 7-8 days out of 90 isn’t much use. When I get time I’ll do another guide on using Amazon (or some other IaaS that offers a free trial without silly I/O limits).
Notes
[1] I realize that open source purists are probably recoiling in horror at this stage. Please go back to twiddling with Emacs. I’m an open source pragmatist (and I’d hope that ESR wouldn’t see much harm from closed source here).
[2] I plan to do another howto on using the Raspberry Pi to access a home network where I’ll go into a lot more detail on SSH and keys. Azure seems very fussy about the format of keys, so it’s worth checking out this howto.
Filed under: cloud, howto, Raspberry Pi | 2 Comments
Tags: Azure, build, cloud, openelec, Raspberry Pi, Raspi, virtual machine, VM, VPS, XBMC




Many thanks for the detailed information in your article. I think you did a great job explaining in detail on how to get started with cloud compilation in Azure. And coming from someone whose machine takes six hours to compile OpenELEC it gave me another perspective on the matter.
If you want to do the compiles on Azure, make sure you use the /mnt/resource volume. You can do “unlimited” io’s there.