Building OpenELEC in the cloud Pt. 2
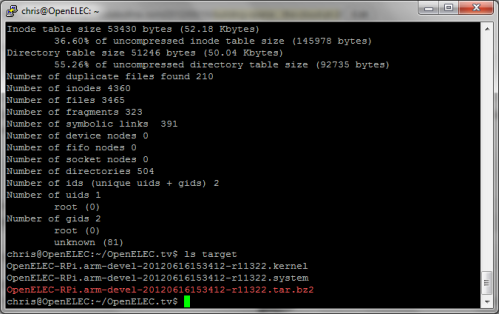
In the first part of this howto I went through signing up for a cloud service, provisioning a VM, installing the build tools and kicking off a build. All being well you should end up with something like this:
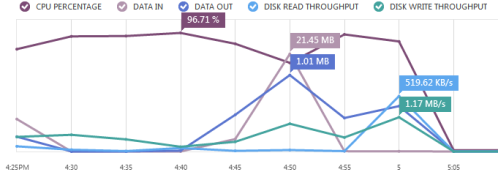
Azure can also give you a pretty chart of how busy the VM was during the build process:
Unpacking the release
First create a directory:
mkdir releases
and then unpack the build:
cd releases
tar -xvf ../target/OpenELEC-RPi.arm-devel-timestamp-release.tar.bz2
Important note: above I’ve used OpenELEC-RPi.arm-devel-timestamp-release as a generic label for something like OpenELEC-RPi.arm-devel-20120616153412-r11322. Please substitute accordingly for the timestamp and release that you’re working with.
Creating an image file
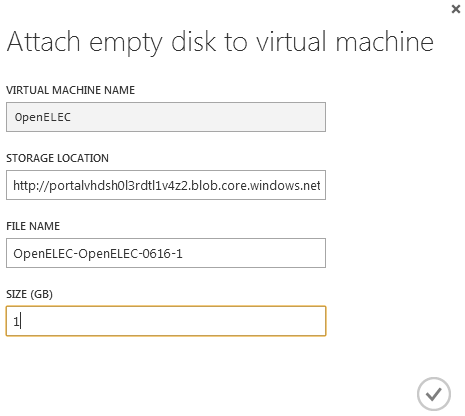
First we need an additional disk to pretend to be the SD card. Hit the attach button in the Azure portal and add a 1GB disk:
The new disk will take a while to provision, and once that’s done a reboot is needed to allow the OS to see it.
sudo reboot now
Wait a minute or two and reconnect via SSH. Then ensure that the newly created disk is clean:
sudo dd if=/dev/zero of=/dev/sdc bs=1M
Next up we need to modify the create_sdcard script. First create a copy of it (we will use this later for automated builds):
cd ~/OpenELEC.tv/releases/
cp OpenELEC-RPi.arm-devel-timestamp-release/create_sdcard .
Now we need to edit the script to create partitions that are smaller than the fake SD card:
vi create_sdcard
Now hit /16 -2 to find the right line then hit A to append to that line, add a 0 on the end, hit Esc to exit insert mode then :wq and Enter to write the updated file and quit out of the editor[1].
Next we create the image:
cd OpenELEC-RPi.arm-devel-timestamp-release
sudo ../create_sdcard /dev/sdc
sudo dd if=/dev/sdc of=../release.img bs=1M count=910
The raw image file is too large to move around, so zip it up and delete the original:
cd ..
zip release.img.zip release.img
sudo rm release.img
Web serving
To serve up the build releases and images requires a web server. This isn’t part of the standard Ubuntu build on Azure so install it with:
sudo apt-get install apache2
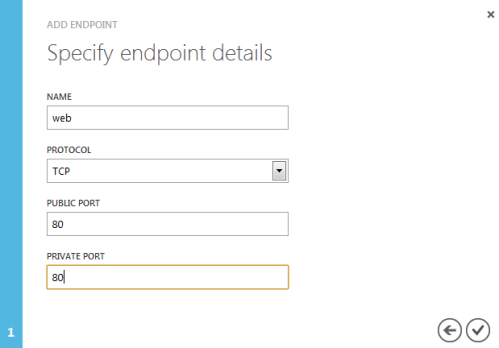
Next it’s necessary to open up the firewall on Azure, which is done via the ENDPOINTS configuration:
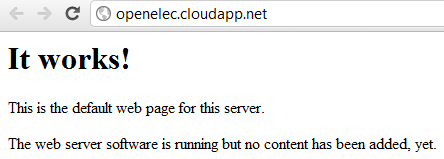
Once that’s done it should be possible to access the web server over the Internet:
With that done, it’s just a matter of removing the default index.html page, and copying over the files to be served:
sudo rm /var/www/index.html
sudo cp ~/OpenELEC.tv/target/OpenELEC-RPi.arm-devel-timestamp-release.tar.bz2 /var/www
sudo cp ~/OpenELEC.tv/releases/release.img.zip /var/www
The files will now be available over the web: 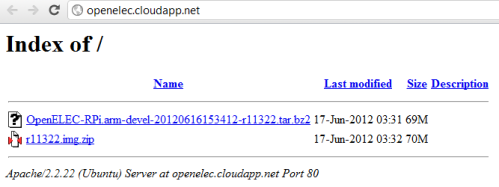
Automating it all
If you’ve got this far then I hope you’ve had fun. You could push out new releases every few hours by following the same steps, but it’s a bit labour intensive. Much better to create a script to run through the steps for you:
cd ~/OpenELEC.tv
vi doit.sh
Hit A and paste in the following script (in PuTTY paste can be done by hitting both mouse buttons; don’t try to select the code below as that will copy over extraneous line numbers – just hover near the top right and a handy copy button will emerge):
#!/bin/bash
# Outer loop for build and image
while :
do
 # Inner loop for git pull
 while :
 do
 GIT=$(git pull)
 echo $GIT
 if [ "$GIT" = 'Already up-to-date.' ]
 then
 echo 'Waiting half an hour for another pull at Git'
 sleep 1800
 else
 echo 'Kicking off the build and post build processes'
 break
 fi
 done
 # Delete old build
 rm -rf build.OpenELEC-RPi.arm-devel
 # Make release
 PROJECT=RPi ARCH=arm make release
 # Set env vars for release package name
 TARBALL=$(ls -t ~/OpenELEC.tv/target | head -1)
 BUILD=$(echo $TARBALL | sed 's/.tar.bz2//')
 RELEASE=$(echo $BUILD | sed 's/.*-r/r/')
 # Copy release build to web server
 sudo cp ~/OpenELEC.tv/target/$TARBALL /var/www
 cp ~/OpenELEC.tv/target/$TARBALL /mnt/box/OpenELEC
 # Unpack release
 cd ~/OpenELEC.tv/releases
 tar -xvf ~/OpenELEC.tv/target/$TARBALL
 # Wipe virtual SD
 sudo dd if=/dev/zero of=/dev/sdc bs=1M
 # Move into release working directory
 cd ~/OpenELEC.tv/releases/$BUILD
 #Run script to create SD card
 sudo ../create_sdcard /dev/sdc
 # Make an image file
 sudo dd if=/dev/sdc of=../$RELEASE.img bs=1M count=910
 # Compress release file
 zip ../$RELEASE.img.zip ../$RELEASE.img
 # Remove image file
 sudo rm ../$RELEASE.img
 # Copy zipped image to web server
 sudo cp ../$RELEASE.img.zip /var/www
 cp ../$RELEASE.img.zip /mnt/box/OpenELEC
 # Go back to OpenELEC directory
 cd ~/OpenELEC.tv
# Loop back to start of script
done
Once that’s done save the file by hitting Esc :wq Enter. Then make the script executable and start it (don’t forget to be running inside of a screen session first so that it doesn’t matter if the SSH session is killed):
chmod +x doit.sh
./doit.sh
OpenELEC will now build each time there’s an update and the release package and image will be automatically server up over the web.
Conclusion
In this two part howto I’ve run through all the steps needed to automatically build OpenELEC for the Raspberry Pi in the cloud:
- Signing up to a cloud service
- Installing dependencies
- Making the build
- Creating images from the build
- Serving images up on the web
- Automating the process
Updates
Update 1 (17 Jun 2012) – The script will pause and wait for a password when it bits that need sudo (after the build is done). This can be fixed by setting up sudo to not need a password for your account:
sudo visudo
Add a line ‘username (ALL) NOPASSWD:ALL’ like this:
Then hit Ctrl-X Y Enter to save and exit
I’ve also noticed that I left the lines in that copy the files to a folder on box.net in addition to the web server. This will fail (without causing any issues) unless you have box.net account mounted at /mnt/box and a folder called OpenELEC within it. This howto describes how to mount box.net using WebDAV.
Update 2 (19 Jun 2012) – My Azure account has been disabled, so none of the URLs in this howto will work.
Notes
[1] If editing goes horribly wrong then hit Esc q! Enter and say Y to saving without changes. This will simply quit out of the editor.
Filed under: cloud, howto, Raspberry Pi | 4 Comments
Tags: Apache, Azure, build, cloud, openelec, Raspberry Pi, Raspi, virtual machine, VM, VPS, XBMC


Good job. Followed all your steps and worked out great.
I notice when I build, it tells me that ProjectM and Goom are both disabled. Do you know how to enable? I can find no configure file, or any way to set it up. I have installed the libprojectm-dev files on my build server.
Have you tried using a ramdisk during the build. That could reduce the high disk io’s hapening during compilation and increase mem i/o which I do not think are counted…
The build directory is a little over 8G, so the VM I was using wouldn’t have anything like enough RAM.