Make and mend (Arduino Simon Pt. 2)
The title for this post comes from an old naval tradition, where a ‘make and mend‘ was time given to fix up clothing. These days sailors get their uniform from stores, and personal clothes from shops like the rest of us; so a modern day ‘make and mend’ is simply some time off. With the rest of the family engaged in various performing arts yesterday I got some time off.
Mending
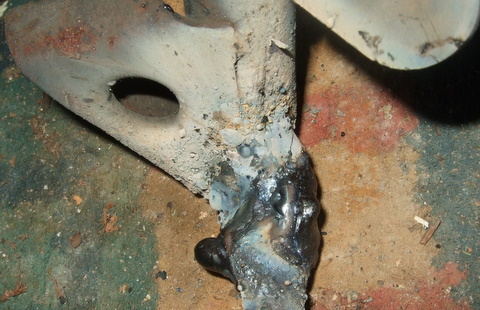
I noticed the other day that my Vespa that I use to get to the railway station in the morning wasn’t sitting on its stand properly. The bracket to push the stand down had been bent out of shape, causing it to lift the scooter on one side a little. My attempt to bend it back was a massive fail, as it just snapped off – doh! If there’s a next time I might choose a less freezing day so the metal is less brittle, or maybe even warm things up with a blow torch.
One of the more fun bits of navy engineering training was a series of workshops, which included a couple of days of welding. It didn’t make me any sort of expert, but the instruction, along with an arc welding machine I was given as partial payment for an IT consulting gig as a teenager means that I can at least make an attempt at getting bits of metal together:
I’m sure it won’t last, but it was a bit of fun, and puts off the day of having to buy a new stand.
Making
Having already fixed up the code for my Arduino Simon it was time to make a more permanent toy using some stripboard. I got an Arduino component bundle from Oomlout and some other bits and bobs like switches and a buzzer from eBay. Sadly when I went looking for stripboard I didn’t have a large enough piece to follow the instructables guide, so I had to improvise with what was on hand:
It might be technically possible to fabricate the circuit with a smaller piece of stripboard, but I’m pretty happy with how things came out. The reverse side shows that I was able to keep track cutting to a minimum (and that if I hadn’t been making it up as I went along I could have figured out that the yellow LED could go straight to its output pin):
More by good luck than good judgement it seems that I’d chosen the right pins as input and outputs to give me a simple and efficient board layout. The ATMega328 pinout was of course essential to figuring out where things needed to go.
Amazingly it worked perfectly first time with the already programmed chip from the Arduino Uno. I thought I could then just drop the chip from the component bundle into the Uno and leave it at that, but when I went to program the game I got:
avrdude: stk500_getsync(): not in sync: resp=0x00
Oops. This turned out to be because the component bundle comes with a Duemilanove bootloader rather than Uno. I was able to program the game by selecting Duemilanove in the Tools menu of the Arduino IDE, then I swapped the chips over so that my Uno bootloader chip was back in its rightful home.
I have one more change planned before I move on from this project. Right now it’s powered by a 9v battery, which is both clumsy and fragile. I’ve ordered a switchable battery box to hold 4x AAA, and I plan to hot glue the stripboard onto that so that the sharp bits on the bottom are dealt with.
Conclusion
Fixing the stand on my scooter wasn’t the best use of my time, and I’m sure I could have got loads of cheap electronic toys for the time and materials spent on my Simon. But that wouldn’t have been anything like as much fun, and I think it’s great to be able to have home made toys – especially when the kids do some of the soldering.
Filed under: Arduino, code, howto, making | Leave a Comment
Tags: arduino, avrdude, bootloader, code, electronics, game, mend, Simon, stk500_setsync():, stripboard, welding


No Responses Yet to “Make and mend (Arduino Simon Pt. 2)”