I went along to Serverlessconf last week and wrote up a couple of InfoQ news pieces about it:
Day 1 – Serverless Operations is Not a Solved Problem
The emergent theme from day one of the Serverlessconf London 2016 was that far from being ‘NoOps’, Serverless platforms bring with them substantial operational challenges. The physical servers and virtual machines may have been abstracted away, but that doesn’t mean an end to infrastructure configuration; and developers ignore the implications of underlying persistence mechanisms at their peril.
continue reading the full story at InfoQ
Day 2 – Serverless Frameworks
The emergent theme for the second day of Serverlessconf London 2016 was the availability and functionality of management frameworks to address the operational issues highlighted on day one. The Node.js based Serverless Framework featured in at least three talks, and there was also coverage of Zappa, a more opinionated Python based framework.
Filed under: cloud, InfoQ news | Leave a Comment
Tags: frameworks, InfoQ, operations, serverless, Zappa
Review – Lenovo X250
TL;DR
I’ve been very happy with the X250 – it’s given me the same performance I got from my X230, but with better battery life, a smaller form factor and it seems more robust.
Long term review
I started writing this post in January not long after I got my X250, but I never got past the title, and another nine months have rolled by. In that time the X250 has been a faithful companion on a pretty much daily basis.
There are many like it, this is mine
RAM and SSD
My X250 came with 8GB RAM and a 256GB SSD, neither of which is really sufficient for my needs, so I dropped in a 16GB DIMM from Crucial[1] and a 500GB SSD from SanDisk[2]. The X250 can take 2.5″ SATA and/or M.2 SSDs, though I’ve not tried the latter (as I already had a spare 2.5″ drive to hand).
Performance
Subjectively the X250 is no better or worse than the three years older X230. That’s fine, because the older laptop had all of the speed I needed, but it’s interesting to note that laptops have essentially plateaued in performance, offering better battery life instead.
For a less subjective view, the X250 gets a Geekbench 3 multi-core score of 5166 (5083 on battery) versus 4065 for the X230 – so there is some extra quantitative performance there. I expect that the newer GPU would also be much better (but hardly ideal) for gaming e.g. it would provide a noticeable improvement to Skyrim, but it’s not going to cope with No Man’s Sky.
Battery
The X250 actually has two batteries, an integral battery in the main body, and a detachable battery in the usual place. Together they provide around 6hrs of real world use, which is sufficient to get through a day away from power outlets at a conference or similar.
Form factor
The X250 and its 12″ screen provide the same width and depth as the older X230, but it’s a good bit shallower whilst still offering full sized VGA and network ports (so no need to carry a bag of adapters).
Screen
The resolution of the 12″ touchscreen is the same resolution as the screen I had before at 1368 x 768, and it’s nice and bright. It’s thicker than the X230 screen, but more robust as a result.
Resilience
After 10 months a worn down Ultrabook label shows that it’s had plenty of use, but that’s the only sign – nothing seems to be otherwise showing any age or wear and tear. It will be another 8 months before I can do a fair comparison, but it seems to be made of stronger stuff than my old X230. It appears that Lenovo have got the old ThinkPad mojo back for making laptops that can withstand what everyday life throws at them.
Niggles
Every Thinkpad that I’ve previously had sported a removable drive bay, which I’ve generally taken advantage of and hence found useful. The X250 has dispensed with this, which means taking off the base (and dealing with potentially fragile plastic clips) to get at the SSD. It’s the same story for the RAM, which doesn’t have an access door.
The M.2 SSD interface only takes SATA drives, so there’s no option for a further boost with NVMe.
The slimmed down form factor means that Lenovo have changed their 20v power supply jack from circular to rectangular, so I’ve had to buy a bunch of adaptors for the handful of power supplies I already had in my daily use and travel bags.
Should I have waited for an X260?
Perhaps – but they weren’t available in December 2015, and I wasn’t going to refuse a laptop that fitted the bill. The Skylake CPU in the later model might have given me even better battery life, but that’s the only difference that I’d expect to notice.
Conclusion
I’ve been very happy with the X250. It’s fast, small, lightweight, has a full selection of ports and can get through the day without worrying about when the next charging opportunity will come. It also seems to show that Lenovo have restored the build quality that traditionally went with the ThinkPad brand, and perhaps slipped a little a few years ago.
Update 23 Apr 2020
I got a few comments to my earlier X230 posts overnight that caused me to revisit this. 4+ years in and my X250 is going strong. The build quality issues I experienced with the X230 haven’t come up. In fact the only things that stop it from feeling like a new laptop are inevitable long term battery decline, and wear and tear to the keyboard and screen. If somebody offered me a new X395 tomorrow I’d take it, but I’m not beating anybody’s door down to get a new laptop – it’s still entirely fit for purpose for my day to day work – enough speed, enough RAM, enough SSD.
I bought my wife an X270 a little while ago, which seems pretty much the same as the X250 in terms of form factor and build quality.
Update 16 Mar 2021
My original X250 made it past 5 years, but I had to give it back. So… I bought another one, which now carries the SSD and extra RAM I’d bought back in 2015. It doesn’t have a touch screen, but I never used that, and it’s in better condition than the one that clocked up over 325,000 miles with me.
If I didn’t have the SSD and RAM I’d have probably gone for an X270, as I’d prefer an NVMe SSD. But I’m quite happy to keep on trucking with an X250, as it’s proven to be performant, robust, and the right size and weight.
Notes
[1] The DIMM failed after about 8 months causing the laptop to become *very* unstable. A quick run of Memtest86 revealed the culprit, and I swapped back to the OEM DIMM whilst Crucial did their RMA process, which took longer than I might have hoped, but was otherwise painless.
[2] I don’t seem to have filled the SSD anything like as quickly as I did the similar size one I first put into my X230, so there’s been no need yet to upgrade.
Filed under: review, technology | 1 Comment
Tags: lenovo, review, X250
The Boiling Conspiracy
TL;DR
Meat can be cooked safely at well below 100C, and comes out better for it, so why do cook books and TV chefs never suggest it?
Background
I love to eat and I love to cook, which is one of the reasons that I made my own temperature controlled sous vide water bath – so that I could experiment with new cooking styles.
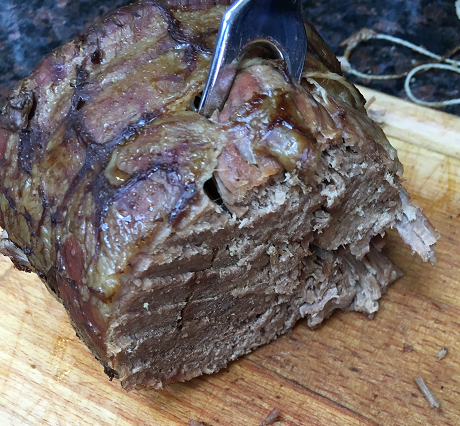
Today’s Sunday Roast was beef brisket that I cooked for 16 hours at 88C (190F). The gravy that I made with the juices was so nice that my wife finished off what was left over with a spoon.
Low and Slow
Using the water bath has encouraged me to try other low temperature cooking methods. I frequently roast leg of lamb or pork belly in a fan oven overnight at around 75C, which brings me to the point – for me the low in ‘low and slow’ is generally below 100C – I don’t boil my food for hours on end.
But I’ve never, ever seen a TV chef or cook book (apart from the excellent Cooking for Geeks) suggest roasting at anything less than 100C (and generally a good margin above that), and with higher temperatures come quicker cooking times, so ‘slow and low’ becomes neither.
It’s an artefact of human history that there were two ways to make water safe to drink:
- Boiling
- Alcohol
Of course neither come into play in the modern first world, where we get safe drinking water at the twist of a tap that doesn’t need boiling. It seems however that 100C has become a magical number for food safety that nobody in the public eye is willing to go below.
If I look at official guidance (such as this from the Canadian government) it ranges from 63C for beef steaks to 82C for whole poultry – all comfortably below 100C. These are of course internal temperatures, so with normal high temperature roasting we might go for an hour or two at 180C or more externally to get to the required internal temperature; but with ‘low and slow’ then (given enough time) the internal temperature becomes the same as the external temperature. This happens quicker with a water bath (which uses conduction) than an over (which uses convection), but given sufficient time (which is the whole point) the outcome is the same.
I strongly suspect that the ‘low and slow’ of earlier generations, before the advent of modern ovens, was generally below 100C – so I expect that we’re just rediscovering the delights of how my grandparents used to get their Sunday roasts (when they were lucky enough to have meat).
There’s an important point here – water turns to steam at 100C and meat dehydrates, so proper ‘low and slow’ results in moist and tender meat, which is why I find it such a mystery that all the modern recipes advise above 100C. My guess is that the TV chefs use proper low temperatures for their own cooking, but are too scared to bring the general public along with them in case some fool messes it up and poisons themselves (and their family).
Filed under: cooking | 2 Comments
Tags: boiling, cooking, roasting, Sous vide, temperature
Let the 80s and 90s computer nostalgia continue…
Between writing about how I learned to code, and watching the latest season of Halt and Catch Fire, I’ve been thinking about how the online services I’ve used over the years have shaped my view of the IT landscape.
WarGames
Like so many others my journey started with the 1983 classic WarGames. I came away from that movie desperately wanting an acoustic coupler (and free phone calls).

Prestel
I didn’t (yet) have a modem at home, but there was one in the school computer room, and we used it to connect to Prestel – British Telecom’s (BT) videotex service. Videotex was a big deal in the UK with BBC’s Ceefax and ITV’s Oracle, but they were broadcast only – Prestel was bi-directional. Prestel was also a big deal in the IT press due to the case against Steve Gold and Robert Schifreen for hacking Prince Philip’s account. They were charged with forgery because there were no hacking laws then.

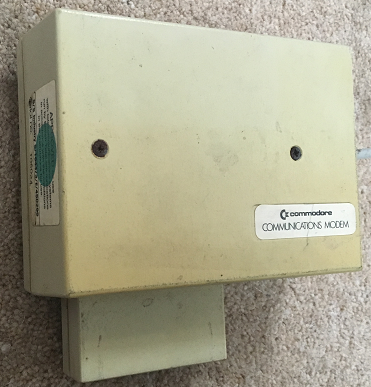
Compunet
I never did get an acoustic coupler, but I finally got my hands on a modem with a promotion by Compunet where they gave away their C64 modem if you signed up to their service for a year. The modem supported the v.23 standard common with videotex services of 1200/75 baud – 1200 bits per second download and 75 upload (and yes – you probably can type faster than that). It also did v.21 300/300, which was generally better for uploading stuff to bulletin board systems (BBSs).
My main problem then was paying the phone bill. I’d get home from school and wait until 6pm for ‘off-peak’ calls, though that put me at odds with the rest of the household wanting to use our single landline for making and receiving calls, and it was still far from cheap. I think eventually we subscribed to BT’s ‘midnight line’ where it was possible to pay a fixed fee for unlimited calls between midnight and 6am – like many teenagers I became semi nocturnal – though the noise from my typing would sometimes result in angry shouts from my mum to pack it in and go to sleep.
Compunet had a great community, and I remember being able to find people who’d help me out with some of the crazy homebrew hardware projects I used to engage in at the time.
Kermit
Some of the companies and organisations I worked with on my evening/weekend jobs found that they needed to send files from office to office, so I created scripts that made the modems connect then transfer files with Kermit.
JANET/CIX
First year at University meant living in halls of residence, which in turn meant no access to a telephone point to use a modem. It didn’t matter much as I had my Amiga and PPC640 on hand. The fact that the University network was connected to JANET, and in turn the entire Internet eluded me at that time.
That all changed in second year. Project work meant burning the midnight oil, and a dialup connection to the University’s VAX cluster gave me a jumping off point into the Unix boxes of both the Electronics Department and Computer Science department, and from there I had worldwide connectivity. The World Wide Web hadn’t been invented yet, so I gorged on a diet of Telnet, FTP and Usenet guided by Zen and the Art of the Internet. One of the amazing things at the time was that people would give you Telnet access to their computers if you just asked. It was also a time when almost everything was connected to the Internet without any firewalls.
At roughly the same time I signed up to CIX[1], a service that I still use to this day. CIX was the place to be amongst the UK’s IT savvy during the early 90s, and it gave me the chance to electronically rub shoulders with IT journalists whose stuff I’d been reading in magazines like PCW for years.
WWW and ISPs
The World Wide Web (WWW) was born just before I left University, but I don’t recall using it then. My first memory of browsing was downloading some pictures from the site for Pulp Fiction using the text browser in CIX’s ‘go internet’ portal. The Lynx based text browser wasn’t the best way to view the web, but at this stage I didn’t have a proper Internet Service Provider (ISP).
My first try of a proper web browser was Netscape on OS/2 WARP, which came with a trial of IBM’s dial up Internet service (which I also managed to get going with Windows 95). By that time I’d ditched the built in modem on my PPC640 for a 14.4kbps Pace Pocket Modem (originally bought to go with a Sharp PC3100, but by then used with a homebrew 486 PC). Shortly afterwards CIX launched a dial up Internet service that I could combine with my usual subscription, so that was an easy switch to make.

Since then it’s been a succession of better browsers with Internet Explorer, Firefox and Chrome, better dial up speed wit 56k modems, then better ISPs/bearers with Nildram ADSL and now PlusNet VDSL. What a shame the UK government haven’t been doing more to encourage fibre to the premises (FTTP) in new build homes, as I’d love a gigabit service.
Note
[1] I still subscribe to CIX, which means I’ve had the same email address for 24 years. If you know that address (or my University email) then you can go back and see my (now sometimes super embarrassing) early Usenet posts.
Filed under: technology | 1 Comment
Tags: CIX, Compunet, FTP, Internet, ISP, JANET, Kermit, modem, Prestel, Telnet, Usenet, WWW
A quick overview of WebVR based on Ada Rose Edwards’ awesome ‘getting started with WebVR‘ presentation that I saw at Nineworlds Geekfest
The demos that I showed off can be seen from Ada’s GitHub pages:
Sadly the odd colour basic demo and the T-Rex thing haven’t (yet) made it from the dev container on my laptop to anywhere in the outside world.
If you want to try developing this stuff yourself then it’s Dockerised:
sudo docker run -dp 4000:4000 --name webvr cpswan/webvr
The title page comment about no conspiracy is because I was the 3rd former Royal Navy person in a line up of 6 speakers at an event that has no leaning towards military/defence stuff – what are the chances of that?
Filed under: presentation, technology | Leave a Comment
Tags: Virtual Reality, vr, web, WebVR
Learning to Code
TL;DR
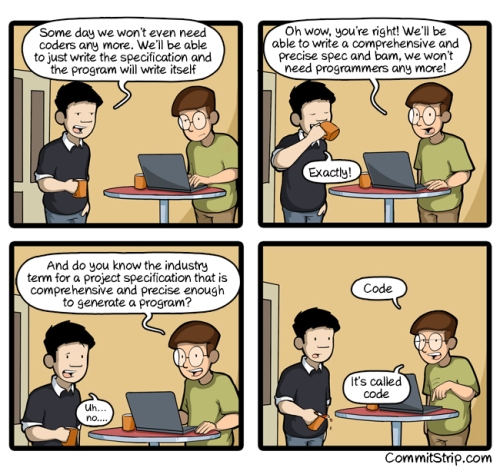
Code defines our relationship with machines, and we all have a unique relationship with machines because we all learn code differently. This is my journey. Yours won’t be the same, because ‘the past is a foreign land’. All that I can hope is that there are some lessons/inspiration here.
Background
This post was inspired by the recent #FirstSevenLanguages hashtag on Twitter, and posts like this one from Paul Fremantle; and then I read Dan Luu’s How I learned to program. Also last week I was at a graduate induction event and referenced GE CEO Jeff Immelt’s statement “Everybody who joins G.E. is going to learn to code. We hire 4,000 to 5,000 college grads every year, and whether they join in finance or I.T. or marketing, they’re going to code.”, which led to a lot of people asking how I learned to code at the networking event later that day.
Primary School
I didn’t get my hands on a computer until I was 10, when my dad bought a ZX81. My brother and I both wanted to play games, which generally meant typing in listings from books and magazines, which then meant debugging our typos, which meant we needed to figure out what was wrong, which meant understanding what was supposed to be right.

Beginners All-purpose Symbolic Instruction Code (BASIC) was pretty much the only show in town at that point, so I learned different dialects as I encountered different machines. An RML 480Z turned up at school, so I got a taste of LOGO, but BASIC was still where things were happening. I found books with games that were in flavours of BASIC that didn’t quite work on the computers I had access to, so I learned to adapt.
Secondary School
My next school was blessed with a room full of computers that I got access to as part of a ‘computer club’ that ran at lunchtimes and some evenings[1]. When I started there were about half a dozen BBC Micros, a variety of Commodore PETs, and an RML 380Z. The latter provided a means for me to learn CP/M and dabble with some ALGOL, but most of the action was still BASIC.

That club, and the people in it, were a source of great inspiration. Particularly one of the 6th formers ‘Stig’ who had been part of the team that won Young Scientist of the Year with a Commodore PET based theatre lighting control system. ‘Stig’ also had tales of helping to fit the BBC Micro ROMs into the available space, and got embroiled in the first real world vs software copyright debacle when Waddingtons sued the publishers of Personal Computer World (PCW) after they published his PET version of Monopoly and featured it on their front cover.

At home we got a Dragon 32, whilst friends had Sinclair Spectrums, and Oric/1s and TI99/4as and all manner of other things from the cornucopia of 8bit home computing. More games, games, games, and BASIC, BASIC, BASIC. I hacked away on a graphics program for the Dragon that I hoped to sell to one of the multitude of software companies springing up to serve the UK market.

The Dragon 32 was a family computer, which meant fighting over it with my brother, and sometimes conceding that it had been bought for my step dad’s degree project (a civil engineering plant depreciation calculator). I wanted my own computer, and that came when Commodore’s commercial disaster the Plus/4 showed up at my local Poundstretcher in a £99 bundle with tape drive, joystick and a bundle of (mostly games) software. I scraped together enough money to pair it with an ex demo Philips TV/monitor on sale at my local Boots and I finally had a computer of my own. Also the Plus/4 had a much stronger BASIC than its more commercially successful predecessor the C64.

The Plus/4 got me writing programs that worked across many Commodore machines (e.g. PET, Vic-20, C64, C16, Plus/4) and at 14yrs old I managed to get a Simon game published in Commodore Computing International (CCI) and a disk utility in PCW. The cheques paid for a second hand C64, a 1541 floppy drive and a printer (so I no longer had to take stuff to school to be printed out).
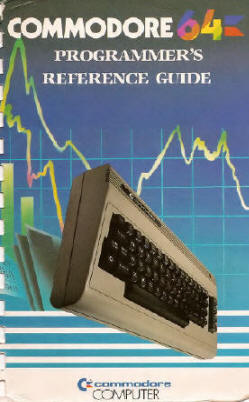
Writing the disk utility got me under the covers of the hardware and the bit twiddling needed for things like undeleting files. The Plus/4 had a decent machine code monitor, so I started to dabble with 6502 assembly (well actually 6510, but close enough). A cheap copy of the C64 Programmers Reference Guide got me exploring the relationship between the CPU and all of the other chips. I also started blowing my own custom ‘Turbo’ boot ROMs for the C64 for my own machine and friends.
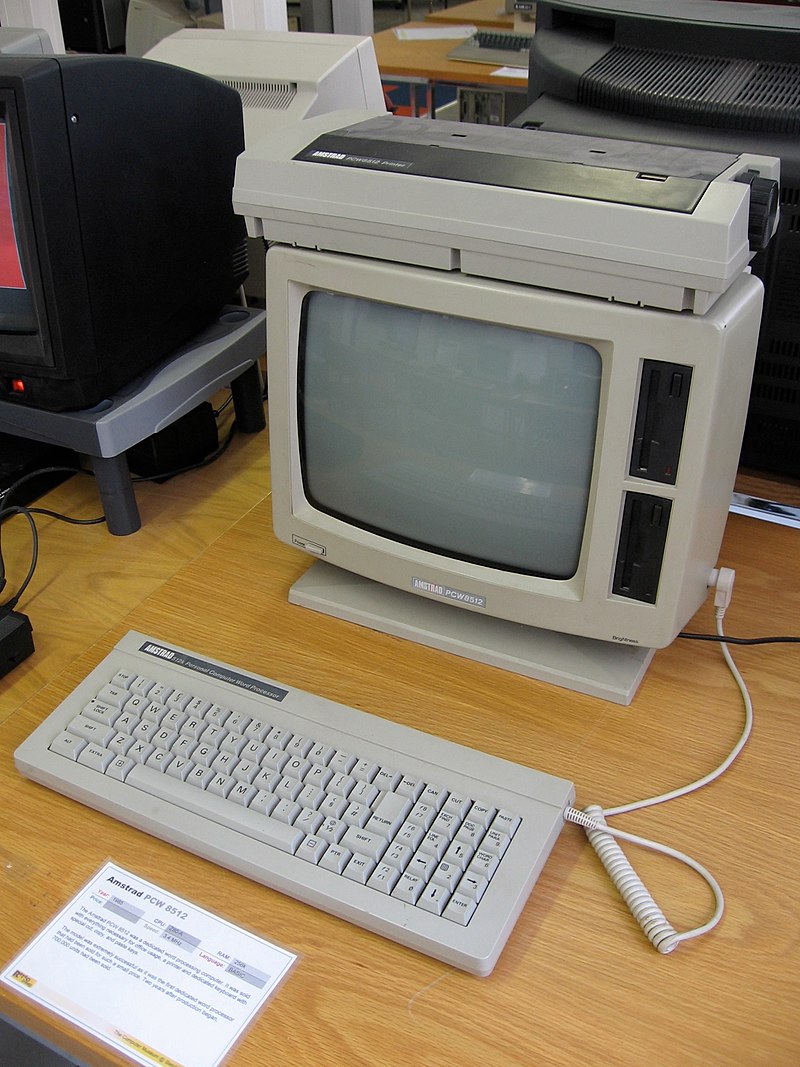
Although I never owned one myself the arrival of the Amstrad PCW became a significant factor, as my dad bought one and so did one of my friend’s dad’s. Whilst they were mostly used for Word Processing the ability to run CP/M opened the door to many other things, and they came with a strong BASIC interpreter.
At the end of this period cheap PC clones like the Amstrad PC1512 started showing up, and I spent a bunch of time setting people up with ‘hard cards’ – a combination of a (typically 32MB) 3.5″ hard disk drive and a controller card that was cheaper than the factory install 20MB 5.25″ HDD. This also got me learning my way around MS-DOS (and particularly autoexec.bat and config.sys).

Computers and programming didn’t feature as any part of the syllabus during this stage at school. I think 6th formers had the option to do a ‘computing studies’ O level, but I didn’t stay at that school for 6th form.
6th Form college
I’m pretty sure that computing wasn’t on offer at A level either, but computer labs (and computers in labs) did show up. I do recall a deal with my physics/electronics teacher that if I taught the microprocessors module in electronics he’d turn a blind eye to me skipping the electronics module in physics.
By this point helping people and local businesses with their computers had become my main source of income for evening/weekend work. Much of it was pretty mundane, like typing in handwritten CVs so that they could be presented more professionally in print, but I got to do some cool stuff[2], and I got to play with just about everything new to the market – Sage Accounting, Digital Research GEM, and early versions of Microsoft Windows.
The point to all that work was finding the means to buy my own Amiga 500 (and also my first car). That was the machine that got me started with C (and also the Amiga version of the REXX scripting language ARexx, which was often used to glue different apps together).

The end of 6th form brought a summer job at BMT Cortec working on their Transputer based ship simulator project. I didn’t get to spend much time with Occam, and working on the project directly, but I did meet my first VAX[3] and learn FORTRAN in order to wrangle a bunch of charts and blueprints into a consistent model of Dover harbour.
Navy/University
The Amiga was left back at home as I headed to BRNC Dartmouth to become a Naval Officer. I’d picked up an Amstrad PPC640 to go with me. It wasn’t exactly a laptop, but it was portable enough. I didn’t get to do much programming, but I did spend a lot of time getting the staff PCs and their word processors working properly.

1st year at University brought PASCAL into the frame, and I did the assignments on the PPC640, infuriating Andy Tyrrell with my habit of making the source as small as I could – I hadn’t figured out at that stage that code was for people and not for computers.

Things got a little more interesting in 2nd year with a project to write an OSI networking stack in C running on some shiny new SGI Indigo boxes, so I got to learn IRIX and SunOS flavours of Unix. There was also some PAL programming thrown into the mix, and I upgraded to an Amiga 1200 (which quickly found itself with a 68030 processor card and a 60MB hard disk).

My final year project got me properly immersed in Occam as I developed a signal processing app on an array of Transputers. I also got a little exposure to Objective-C by working in a lab full of people with NeXT boxes. It was a privilege to rub shoulders and hack on stuff with some participants in the now infamous ‘Linux is Obsolete’ Tanenbaum-Torvalds thread. My real time systems module with the computer science department also got me into Ada, which at the time was very hot due to the DoD mandate to use it for defence equipment (and the University of York was at the heart of that hotness, as one of the handful of places that had developed Ada compilers).

A 42 Transputer board like the one I used
Returning full time to the Navy I entered a world of training establishments that were just picking up Windows for Workgroups and the underlying networking. Windows brought with it visual programming, but rather than picking up Visual Basic I went with the PASCAL derived Borland Delphi, writing apps for things like determining the correct alignment of satellite communication antennae.
I’d been around to witness the birth of the web, so I naturally started playing around with HTML and Perl. A lot of my computer time went on practicing for MCSE exams, but I also got into Linux (Slackware then Red Hat 4 if I recall) and compiling my own kernels for the obscure hardware that started showing up everywhere for next to nothing as companies purged themselves of anything vaguely Y2K threatening.
The Java (and .Net) years
Missing the exploding .com bubble was one of the main factors that drove me out of the Navy, and a few months later I found myself heading up the application server engineering team at an investment bank. The main job was scripting installations for app servers like IBM’s WebSphere and BEA Weblogic. I wasn’t a Java developer, but I often found myself picking over poor quality Java code in order to make it run properly, so I leaned the difference between a JavaBean and an EJB and quickly became a JVM tuner.
In the parallel universe of of Microsoft stuff (which we were a big user of, having on hand the ‘gods of brittle architecture’ who’d made Microsoft’s ill fated ‘DNA‘ work) .Net was launched, and I found myself frequently flipping between C# and Java.
The end of this period found me using C++ in anger for the first time since doing a course on in in the mid 90s in order to tickle CPU-ID instructions on a menagerie of a few thousand servers making up a compute grid (we had issues with Hyper-Threading). I also got to appreciate the difference between idiomatic Java and Java written by hard core C++ programmers.
Little Things
As the day job rotated between IT infrastructure, banking and infosec the kids were growing up and I wanted stuff that would introduce them to the joys of programming.
Arduino introduced me to Processing. MSP430 got me doing C again (and learning a lot more about compiler limitations), and the Raspberry Pi got me doing more with Python. Then Justin Cormack introduced me to the joys of Lua (which crops up all over the place), and IBM Node-RED team got me hacking on some JavaScript. Along with way I encouraged the kids to do various courses on Codecademy, which I ran through myself.
Infrastructure as Code
This entire post is about code and programming languages, but I’ve spent most of my career on the Ops side of the Dev-Ops split. Although I’ve occasionally been paid for writing some software I’ve never considered myself a professional developer. But infrastructure is becoming defined by code.
Ruby was the tool of choice whilst I was at Cohesive Networks, and some familiarity with it was useful as I found my way around Puppet and Chef. I also found myself becoming serious about bash scripts, and leaning heavily on Google’s Shell Style Guide and ShellCheck. Picking up Ansible was also helped by some previous Python familiarity.
The dominant force in infrastructure software for the past few years has been Go (or Golang). Docker is written in Go, Cloud Foundry has been rewritten in Go, all of the new Hashicorp tools are in Go. It’s the first new systems and application language since C, and it’s clearly designed to make relatively inexperienced programmers productive whilst bringing with it the Communicating Sequential Processes (CSP) support for concurrency that I first encountered in Occam. Good software is often defined by having great documentation, samples and examples, and Go gets off to a great start with its Tour of Go.
I’ve also had a brief flirtation with OCaml and functional programming as I looked into unikernels.
Looking to the future
The language geeks I know aren’t that excited about Go, but mostly are excited about Rust, which is also a systems programming language that can work on small devices (even the micro:bit). I’m also keeping a close eye on Swift, especially since it was open sourced leading to a lot of server side activity from IBM. The launch of the Swift Playgrounds for iOS devices could also get a lot of younger people using it.
Conclusion
I’m an electronics engineer rather than a computer scientist, so the pattern here is that I learn languages to do software stuff that makes hardware do what I need. A lot of the story above is about the hardware I had at hand as much as the programming languages I used to code against it.
Notes
[1] This became every evening after we made copies of the keys to hack around the need for adult (or 6th former) supervision.
[2] One of my all time favourite hacks for a customer was adding a 555 timer to a 5.25″ drive so that it could simulate the eject signal found on the newer 3.5″ drives that came with the IBM PS/2 they were using (they had a ton of stuff on older disks that they wanted to transfer).
[3] There were actual people in white lab coats looking after the VAX.
Filed under: cle, technology | 4 Comments
Tags: .Net, Ada, ARexx, BASIC, c, code, coding, Delphi, FORTRAN, Go, golang, HTML, java, javascript, LOGO, Lua, Objective-C, OCAML, Occam, Pascal, Perl, Processing, programming, python, Ruby, Rust, Swift
Racist, abusive or foul language
In my last post ‘The Surveillance Party‘ I wrote about how the UK Labour Party used their ersatz SIGINT operation to exclude me from their leadership election process. I was told ‘You posted inappropriate comments on social media on 5 July 2016’, so let’s take a look at my tweets and see what might have scored as ‘racist, abusive or foul language’.
Before proceeding it’s worth noting for any readers who don’t know me personally that I don’t use Facebook, which is why I’m just looking at Twitter.
Racist
I don’t think any of my tweets that day (or any other day) were racist or could be interpreted to be racist. I do however realise that as a reasonable well off, middle class, middle aged, white, CIS guy I get to play life on the easy settings, and may not notice the hidden bias in my language; so comments welcome on where I’ve transgressed so that I can correct my behaviour going forward.
Foul language
This one is perhaps a slam dunk:

I’ve RT’d an account with a naughty word in its name, which would have been an easy hit for an analysis system with a ‘foul language’ blacklist. It may not have mattered that it wasn’t me using that word – guilty by association.
Abusive
This is where we venture into the political correctness twilight zone, so I’ll tune for the most hysterical interpretations of what might cause offense and thus be interpreted as abuse…
Immigrants
Here’s a reply to Dick Morrell venting his anger about Brexit:

In this tweet I imply that some of the Brexit voters don’t like immigrants. I think from the media coverage that it’s a fact that many Brexit voters voted that way because they don’t like immigrants, so I’ll take that as a fact; but I recognise that people can still take offense from statements of fact, especially when they’ve aligned themselves with a group associated with the fact (whether it’s a view they hold themselves or not).
Rail unions
Here’s a complaint about the atrocious state of the South Coast main line for the last few months:

This could be taken as a jab to the Rail Maritime and Transport workers Union (RMT) and their ongoing industrial action, though that day it was just run of the mill signalling problems.
Disabled/old
Here’s an RT of a wonderful article showing how technology (in the shape of the Apple Watch) has helped a deaf/blind person. Based on the excellent CloudCamp London presentation by Chris Lewis I repeated his point that old age will make us all disabled to some degree:

Could this somehow be interpreted as abuse of disabled people and/or old people?
Blairites
This is definitely my most political tweet of the day, but it’s quite subtle in that it doesn’t directly mention Blair or Labour. My friend Justin Cormack had tweeted an FT article about a potential split in Labour along the lines of when the ‘gang of four’ split to create the Social Democratic Party (SDP). I replied:

So this is a pretty clear statement of fact. The ‘gang of four’ weren’t any of those things; but by implication I’m pretty clearly accusing the potential ‘SDP mark 2’ splitters of being:
- neoliberal (a label which no politician ever seems to have aligned themselves with – there are no self describing neoliberals).
- war criminal aligned – because Blair and his cronies lied to the British public to engage in an illegal war in Iraq that’s had terrible consequences here in the UK, but even more terrible consequences for Iraqis. Frankie Boyle summed it up perfectly a few weeks earlier here, and let’s not forget that the entire purpose of the #chickencoup seemed to be to derail Corbyn ahead of the publication of the Chilcot enquiry. As Blair hasn’t been found guilty of anything (and I expect he never will – at least outside of the court of public opinion) I was perhaps missing an ‘alegedly’, but 140 characters!
- heels – according to the Oxford dictionary ‘an inconsiderate or untrustworthy man’ (informal, dated). Potentially a term of abuse, but hardly a very strong one.
- clutching for power at any cost – because they’d rather split from the party that got them voted in than face deselection for not toeing the line from the leader elected by their party.
It takes what I expect to me more than £22 worth of analysis to pick this one apart, and anybody thinking that they’re the target of my ‘abuse’ here is almost certainly a more genuine enemy of the party than I ever will be – because they’re the ones who would split away to satisfy their own political careers.
#ChilcotReport #ChickenCoup
This RT doesn’t show up in the advanced search I linked to above, but I did RT it on 5 Jul:

It’s clearly a political tweet, but does calling some MPs ‘chickens’ count as ‘abuse’?
Conclusion
Along the lines of ‘rather be hanged for a sheep than a lamb’ I’m hoping that my offending tweet was the ‘SDP mark 2’ one where I call potentially splitting Blairites ‘neoliberal war criminal aligned heels clutching for power at any cost’, but knowing how this type of sausage is made I’d bet that it was the naughty word in name RT :(
Filed under: politics | 1 Comment
Tags: #ChickenCoup, #LabourPurge2, abusive, blacklist, Blair, Brexit, Chilcot, Corbyn, disabled, Labour, old, politics, racist, RMT, SIGINT, swearing, Union
The Surveillance Party
TL;DR
The UK Labour Party has been running an ersatz signals intelligence (SIGINT) operation to identify and exclude members and supporters that they don’t want voting in their leadership election; people who under some sort of criteria are identified as enemies of the party. This should be terrifying, as the difference between enemy of the party and enemy of the state is an election away (and if that party gets its hands on the levers of state power then it levels up to a full capability SIGINT operation).
I don’t think it’s overstating things to say that this is the most significant post Snowden example of the impact of mass surveillance on democracy.
Background
A vote of no confidence in leader Jeremy Corbyn from the members of parliament (MPs) in the Labour Party has triggered a leadership election. I won’t go into the details here, as it’s covered in its own Wikipedia entry. The party has been crawling through social media to identify unwanted members and supporters and exclude them from the party or leadership election process. The Twitter hashtag for this process is #LabourPurge2.
I applied to be a ‘supporter’ of the Labour Party as I feel it’s important that the country has an effective political opposition and I wanted to have a say in the process. Here’s the letter I got:
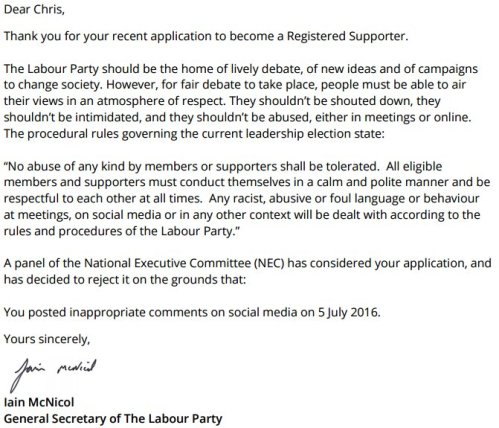
I’ll use another post to pick apart my 5 Jul 2016 Tweets for what might be considered ‘racist, abusive or foul language’ (and whether any of that could be construed as being aimed at Labour Party members) as I don’t want to get sidetracked on this post.
The point here is that they went a few weeks back before finding something that matched the criteria to exclude me. The interesting questions I’ll spend the rest of the post on are: who are ‘they’, what are ‘the criteria’, and how is this all being done?
‘They’ are watching, in secret
Somewhere at the core of the Labour Party there’s a bunch of people who decided that this was necessary, and somewhere else there’s a bunch of people actually doing the spade work. I’m not going to waste time here speculating about the motivations of the former group. The interesting part is that even with open source collection (like public tweets or Facebook posts) and sophisticated analysis tools there needs to be some degree of human assessment. The humans doing that are (like in the case of grown up SIGINT operations) having to do their work in secret, because the reveal the details would be political dynamite. The last thing that the group directing this will want is their criteria being spilled out (like say the ATOS fit-to-work checks), so they can’t just outsource it to the lowest bidder – a high quality circle of trust needs to be established here.
This is where I necessarily stray into speculation (because the facts are hidden):
- I expect that the work is being done by a law firm, because they provide clerical/analytical skills for hire, and understand (and most importantly respect) non disclosure agreements. Another possibility would be a ‘big 4’ type consulting firm.
- The £25 paid by ‘supporters’ is being used to pay the professional services fees associated with this whole exercise.
- Somebody had already figured out the cost of this exercise hence the steep jump in the ‘supporter’ fee (it was £3 last time).
What are the criteria?
The precise criteria of what makes an ‘enemy of the party’ are secret, and that’s a big part of the problem, but we can get some feel for it by observing the responses to and reactions of those being excluded.
Isn’t this just about enforcing the rules?
I’ll take a brief diversion here on the topic of party rules and how they’re interpreted. One might argue that the criteria are publicly and transparently embodied in the party’s rules, and this whole exercise is simply about ensuring that the rules are properly enforced. It’s quite fair and proper that a party doesn’t want people who are racist, abusive or use foul language; but each of those things is open to some degree of interpretation, and it’s in that interpretation that the true criteria for this exercise lie. When I pick through my tweets for 5 Jul the only thing I can be sure of is that I didn’t press the racist button – the criteria are subtle enough that it’s not clear to me which tweet got me found out as an enemy of the party. What I am pretty sure of is that if it hadn’t been 5 Jul then there would have been something incriminating further back in my timeline.
It’s harder on members
I was only trying to be a ‘supporter’ before being found out as an enemy of the party and excluded. People who’ve switched allegiances from other parties to Labour have found themselves excluded for their past support of those previous parties. Here’s an example from Ben Crawford (picked from the top of the pile on #LabourPurge2):
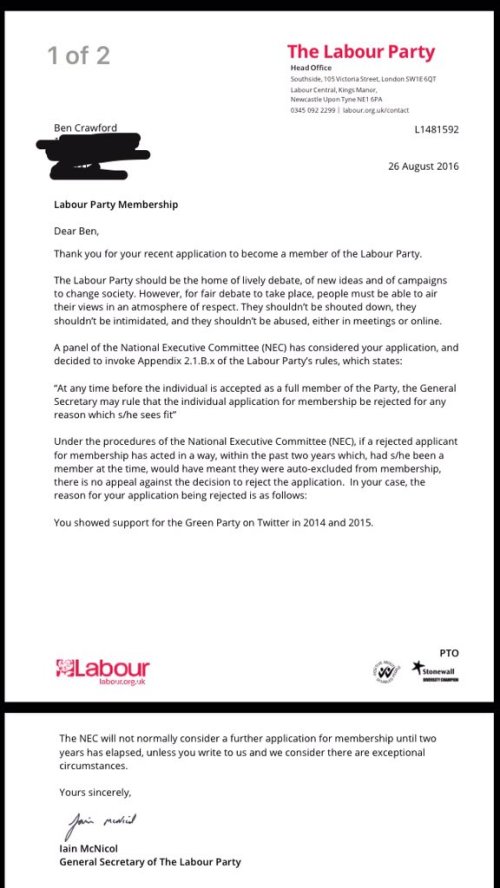
Here lies the point about the dangers of using SIGINT like this – people are being found guilty for their sins of the past. It creates a world where nobody can engage in politics and change their mind (because they think something changed or they were presented with a better argument, reasoning or set of data). It means that only the purist ideologues can engage in the political process. It is exclusionary.
Conclusion
I’ve used the word ‘exclude’ a lot in this post, because that’s what this is about – exclusion. Rules against people who are racist, abusive or use foul language are there to create an inclusive environment, but they’ve been twisted into a set of SIGINT filters to identify ideological enemies and exclude them. We’re getting a front row seat here to what happens when modern SIGINT is used for political purposes, and I’m writing this because I don’t like its impact on democracy.
Filed under: politics | 2 Comments
Tags: #LabourPurge2, Corbyn, enemy, exclusion, Facebook, Labour, politics, purge, SIGINT, Snowden, social media, state, twitter
Self Encrypting Drives
TL;DR
Many SSDs are also Self Encrypting Drives (SEDs) they just need a few bits flipped to make them work. As the SSDs use encryption under the hood anyway there’s no performance overhead.
Background
This is something of an almanac post after a couple of days of prodding around the topic of PC device encryption. I wanted to make sure that the PCs I use for work stuff were properly protected, but I also wanted to minimise the impact on performance.
Bitlocker
As my laptop runs Windows 8.1 it seemed obvious to check out BitLocker, but a quick search revealed that software based BitLocker has some degree of performance overhead.
In the end I actually went with BitLocker on my laptop, as the SanDisk X300 SSD I have isn’t a SED (as it doesn’t support Opal or Microsoft eDrive), which is a shame as the article I found on the X300s gives a pretty good review of what’s out there.
Even if I did have an X300s rather than a plain old X300 the eDrive/BitLocker combination wouldn’t have been easy, as it requires doing a clean install of Windows rather than letting you keep your existing setup.
SEDs
SSDs use encryption internally anyway so that the blocks written to flash memory don’t have long runs of 1s or 0s, so it’s almost trivial for an SSD to also be a SED – all that’s needed is a means to manage the keys that are used to unlock that encryption. Out of the box SEDs are like safes with the door open and no combination set – they just need some tools to set the lock.
Class 0
With my desktop machine (a NUC) I’ve got a Samsung SSD that supports three different modes of encryption:

- Encrypted Drive is eDrive/BitLocker – too much trouble to configure
- More on Trusted Computing Group (TCG) Opal below
- Class 0 just uses a BIOS boot password. After reading this piece on Class 0 I decided it was probably worse than useless.
Opal and sedutil
The X300s article had run through the basics of Opal and use of the Wave Embassy app to enable it. Sadly as I have just a plain X300 I wasn’t getting a free license for that. There are a bunch of commercial offerings for Opal, from the usual suspects, and frankly they all look awful.
Open Source to the rescue… the Drive Trust Alliance offers sedutil for Windows and Linux. It’s a combination of a command line tool to configure Opal, and a Linux based pre boot application (PBA) to ask for the password that unlocks your drive.
After a bit of downloading and testing I confirmed that I was good to go, and following the encrypting your drive instructions worked perfectly.
The user experience
Most of the time the encryption is totally seamless in terms of performance and use experience. The only change is at boot (or resume from hibernation) when the PBA is launched first and asks for a password – the system then unlocks the SSD and reboots into the normal OS.
No Sleep
The one issue seems to be that the system will no longer make use of sleep mode, instead dropping into hibernate (to force a request for the password for resume). I can see why that’s more secure, but for my own use case I’d be happy to have sleep/wake without being asked for a drive password.
Conclusion
I wish the drive in my laptop was a SED. The BitLocker performance overhead isn’t too annoying, and it didn’t even take too long to encrypt the whole SSD, but it’s still sub optimal.
Using open source tools with the SED in my desktop was quick and easy. So if I’m even unlucky enough to be burgled I won’t have to worry about the data on that device.
Filed under: security | 3 Comments
Tags: BitLocker, eDrive, encryption, Opal, sed, ssd, TCG

