Beware the default network
I was helping a colleague troubleshoot a deployment issue recently. He’d set up a virtual private cloud (VPC) in Amazon with a public subnet and a bunch of private subnets:
- 10.0.0.0/16 – VPC (the default)
- 10.0.0.0/24 – Public subnet
- 10.0.0.1/24 – Private subnet 1
- 10.0.0.2/24 – Private subnet 2
- 10.0.0.3/24 – Private subnet 3
Everything was behaving itself in the first two private subnets, but nothing in the third one was reachable from the hosts in the public subnet. After lots of fine toothed combing through the AWS config we took a look at the routing table on a host in the public subnet:
Destination     Gateway         Genmask         Flags Metric Ref    Use Iface
default         ip-10-0-0-1.eu- 0.0.0.0         UG    100    0        0 eth0
10.0.0.0        *               255.255.255.0   U     0      0        0 eth0
10.0.3.0        *               255.255.255.0   U     0      0        0 lxcbr0
172.16.10.0     *               255.255.255.0   U     0      0        0 docker0
172.31.0.0      m1              255.255.0.0     UG    0      0        0 tun0
172.31.0.0      *               255.255.0.0     U     0      0        0 tun0
192.0.2.0       192.0.2.2       255.255.255.248 UG    0      0        0 tun1
192.0.2.2       *               255.255.255.255 UH    0      0        0 tun1
192.0.2.8       192.0.2.10      255.255.255.248 UG    0      0        0 tun3
192.0.2.10      *               255.255.255.255 UH    0      0        0 tun3
192.0.2.254     *               255.255.255.254 U     0      0        0 eth0
224.0.0.0       m1              240.0.0.0       UG    0      0        0 tun0
The problem here is a conflict between 10.0.0.3/24 configured as a VPC subnet, and another 10.0.0.3/24 configured on the host for lxcbr0 – a relic from an early Docker installation[1] that used LXC (and allowed it to install its default bridge)[2]. We worked around this by creating a 10.0.0.4/24 instead – an easy fix – this time.
You won’t be so lucky with VPC Peering
Amazon announced the availability of VPC Peering a little while ago. It’s a pretty cool feature, and it’s worth taking a look at the peering guide, and the recent Evolving VPC Design presentation from the London AWS Summit for more details. There is one key part that needs to be called out:
The VPCs to be peered must have non-overlapping CIDR blocks.
That means that if you’re using the default 10.0.0.0/16 then you can’t peer with anybody else (or indeed any of your own networks in other accounts) using that default, which right now is pretty nearly everything.
Amazingly it is possible to peer together overlapping CIDRs indirectly, so I can join my 10.1.0.0/16 network A to a number of 10.0.0.0/16 networks (B,C etc.); but there’s a couple of catches: firstly peering isn’t transitive (B can’t talk to C), and secondly I can have a subnet of A connected to B, and a different subnet of A connected to C, but not the same subnet in A connected to B and C[3].
Recommendations
It’s easy to say plan your network carefully, but that’s a bit like saying plan your family carefully. Circumstances change. Networks grow organically. Things have to be joined together later because company X bought competitor Y (which seemed unimaginable to both of their network engineering teams).
- Avoid the defaults – using 10.0.0.0/16 for a VPC will pretty much guarantee trouble with peering.
- Don’t use the next range along – 10.1.0.0/16 is only one better than the default; 10.254.0.0/16 isn’t 254 times better. There are 253 other networks to play with (just in the RFC1918 class A), and picking one at random is likely to be a good strategy.
- Use smaller networks – a /16 is a LOT of IPs. The smaller the network the less chance of collision with another.
Notes
[1] Since version 0.9 Docker doesn’t actually use LXC any more by default, preferring its own native libcontainer.
[2] If you’ve been playing around with Docker since the early days and you have these bridges laying around then they can be removed using:
sudo ifconfig lxcbr0 down && sudo brctl delbr lxcbr0
[3] This kind of thing comes up all the time when making VPN connections in partner networks where it’s only a matter of time before overlapping RFC1918 ranges come along (usually 10.0.0.0/8 or 192.168.0.0/24 or close cousins). It is actually possible to deal with situations like this using source network address translation (SNAT) and network mapping (where one range gets mapped to another to avoid conflict). This is something we’ve supported in VNS3 for a little while.
Filed under: cloud, CohesiveFT, Docker, networking | 1 Comment
Tags: aws, CIDR, conflict, defaults, Docker, howto, LXC, lxcbr0, networks, peering, routing, troubleshooting, VNS3, VPC
The dust is starting to settle now in the wake of Heartbleed[1] – those that are going to fix it have already, other servers that are suffering from the issue will remain vulnerable for years to come. It’s time now for reflection, so here’s mine.
![]()
I was on a family vacation when Heartbleed was announced, and the first tweet I came across in my timeline was from Docker’s Jérôme Petazzoni:

It was very prescient, and in retrospect the situation reminds me of the fabled Tortoise and the Hare.
The Tortoises
Heartbleed only affected relatively recent versions of OpenSSL[2], so those companies plodding along on older releases weren’t affected. This included CohesiveFT. We base our products on Ubuntu Long Term Support (LTS) distributions, and everything in production was based on 10.04[3].
Some argue that the tortoise approach can be insecure, but the beauty of long term support is that critical security issues (like Heartbleed) get patched up.
In this particular case the Tortoises were in good shape, as their distributions carried older OpenSSL variants that weren’t affected.
The Hares
The Hares are the companies that always keep on the latest builds. For service providers this probably meant that they had a single version of OpenSSL in the wild (or a handful of versions across a portfolio of services) and they had a busy day or two patching and refreshing certificates. Product companies will have had a slightly different challenge – with newer versions requiring patches and perhaps some older releases that could be left untouched.
The accidental Hares
If you’re a Hare then you have to keep running. Stop for a break and you’ll lose the race.
The accidental Hares are those that just happened to pick up a distribution or stack with OpenSSL 1.0.1 in it, but they don’t actively patch, update, and keep on the latest version. It’s the accidental Hares that will be polluting the web for years to come with servers that pretend to be secure but really aren’t.
Mixed environments
This is where the real effort will have been expended.
A friend of mine recently started a new risk management role at a large bank. This Twitter conversation sums up what happened:

I recall a similar experience as a result of the RSA SecurID breach.
I expect that one of the major challenges will have been firstly figuring out what had OpenSSL inside of it, and then what versions. No doubt there’s now some kind of inventory of this in most large organisations, but for the majority it will have taken a massive fire drill to pull that inventory together.
What have we learned?
This time the Tortoise ‘won’, but this single event shouldn’t be used to support a Tortoise strategy. The Hares tend to be more agile.
It’s better to choose to be a Tortoise than it is to be an accidental Hare. ‘Enterprise’ and ‘Long Term Support’ versions of stuff that move slower still require you to take the security patches when they come along.
Having a detailed inventory of underlying dependencies (especially security libraries) for mixed environments will save a lot of trouble when the fire drill bell starts ringing.
The cost of fixing Heartbleed for users of OpenSSL has been many orders of magnitude more than the contributions towards OpenSSL. It was common knowledge that OpenSSL is a mess, but nobody was previously willing to spend the money to improve the situation. It’s easy to be critical of such projects (I’ve been guilty of this myself), but now’s the time to collectively spend some effort and money on doing something.
Static analysis tools don’t always work. It’s fair to assume that everybody in the tools business looks at the OpenSSL code a lot, and they all missed this. It turns out that there’s actually quite a bit of effort involved to make static analysis find Heartbleed.
Many eyes make bugs shallow, but some bugs are very deeply buried, and those many eyes need to be integrated across time. I think ESR is right that Heartbleed does not refute Linus’s Law. There are in fact statistical models out there for how many bugs a given code base will contain, how many of those bugs will be security issues, and what the many eyes discovery rates look like against introduction rates (let’s call that ‘many fat fingers’). Something like Heartbleed was sure to happen eventually, and now it did. There will be more, which is why every defensive position in security needs to be backed up by the ability to respond.
Despite the claims and counter-claims regarding the NSA’s knowledge of Heartbleed I think it’s safe to say that we’d have heard about it via Edward Snowden if it was being actively exploited prior to around a year ago. That said, this is good fuel to the debate on whether intelligence agencies should be using their resources to help with defensive capabilities or using vulnerabilities offensively against their targets.
A closing note about the Internet of Things
There were lots of Monday morning quarterbacks warning that it if it’s hard to patch up software to respond to Heartbleed then it will be almost impossible to patch up the hardware that will form the Internet of Things. A few months back I did an OSHUG presentation on security protocols in constrained environments. I was critical of OpenSSL in that presentation, and it didn’t feature prominently because it’s not tailored to embedded environments.
I suggested at the time that there was an ‘amber’ zone where security can be done, it’s just fiddly to implement. Heartbleed has made me reconsider this – security doesn’t have to just work when the device is made, the security needs to be maintainable. This definitely moves the bar for complexity and implied hardware resources. Maybe not all the way to the ‘green’ zone of comfortable Linux distributions, but a good bit in that direction.
Notes
[1] For a comprehensive explanation of Heartbleed I can highly recommend Troy Hunt’s ‘Everything you need to know about the Heartbleed SSL bug‘. There’s also an XKCD version.
[2] The bug was introduced to OpenSSL in December 2011 and was in the wild since OpenSSL release 1.0.1 on 14th of March 2012. At the time of the announcement the following version history was relevant (from new to old):
1.0.1g NOT vulnerable
1.0.1 through 1.0.1f (inclusive) vulnerable
1.0.0 NOT vulnerable
0.9.8 NOT vulnerable
[3] Our (at the time beta) VNS3 3.5 is based on Ubuntu 12.04, and so it was affected by Heartbleed. The CohesiveFT development team patched the beta version, and the April 30 general availability release is not vulnerable.
This post originally appeared on the CohesiveFT Blog.
Filed under: CohesiveFT, security | Leave a Comment
Tags: Heartbleed, IoT, OpenSSL, security, SSL, tls, vulnerability

It’s been over a month now since the price drop announcements for Google Compute Engine (GCE) and the follow on price drops for AWS and Azure. This stuff has been well covered by Jack Clark at The Register, former Netflix Chief Architect Adrian Cockcroft, and my CohesiveFT colleague Ryan Koop. For an in depth strategic background I’d recommend taking a look at the interview I did with Simon Wardley on the Cloud Landscape.

In this post I want to look at how Google were able to do it (and why Amazon didn’t feel obliged to follow suit). I think it comes down to 2 things:
1. Scale
Amazon is building out enormous scale for its cloud, but Google already has enormous scale and is building quicker. Google is spending $2.35Bn per quarter on data centers, whilst for Amazon it’s just over a $Bn. Of course that’s not an apples to apples comparison – that Google investment is for running their services – search, gmail, Google+ etc. and the Google Cloud Platform is just a small part of that. With Amazon it’s the opposite story – their retail services might run on AWS nowadays, but the story about them selling excess capacity was always bogus, and Amazon.com is a tiny fraction of AWS capacity.
Google’s secret weapon here is that its scale is fungible. If customers want more GCE then Google can make a cold hard calculation about whether it makes more money from a machine serving up search results or renting out VMs. Anybody that knows how Google runs its economic models knows that those calculations have already been made (and that the balance surely tilts towards *aaS being a better business than selling advertising).
2. Existing customer base
Amazon has a huge existing customer base. If they drop prices too far then they’re going to hit a double whammy:
- Revenues and profitability will drop.
- Demand will go up, and may easily go past the point where it can be met by those ever growing data centres – leading to customer dissatisfaction.
On the latter point there was already an issue with shortages of C3 instances after they launched, because they provide excellent performance for relatively little money. Amazon knows its economic model as well as Google does, and hence how far it can push before risking supply exhaustion.
Google has no risk of supply exhaustion – in part because they have a small customer base (at least relative to Amazon – I’m sure it’s a lot bigger than many other public clouds). Google’s winning hand here is that it can cope with new customers arriving and existing customers using more – because of that infrastructure fungability.
Conclusion – fungability wins both ways
Randy Bias has said many times that when it comes to public cloud ‘Amazon is the one to beat, and Google is the one to watch’. Some of that comes from Google’s technical competence (and their second mover advantage that lets them learn from Amazon’s few mistakes), but in the long haul the really important thing will be infrastructure fungability. Google has more infrastructure than Amazon, is building more quickly, and has the ability to divert that huge capital investment from one service type to another. They will definitely take the hit on serving your search results slower if it means they can rent me a VM for more $.
This post originally appeared on the CohesiveFT Blog.
Filed under: cloud, CohesiveFT | Leave a Comment
Tags: amazon, aws, CAPEX, cloud, fungability, GCE, google, iaas, Jack Clark, pricing, RAM, Simon Wardley
Done with Bejeweled Blitz
Shortly after I got my first PDA (a Palm OS Sony CLIÉ) my friend Gav showed my Bejeweled on his Palm Pilot. I got it for myself, and I played that game a lot.
It was some years later when Bejeweled Blitz came along on Facebook. I played that a bit, but Flash games on a desktop or laptop aren’t the greatest. Then it was ported to iOS (and Android) and I found a new time filler. I’ve played a lot of Bejewelled Blitz over the past few years whilst watching TV or waiting for trains/planes/people/whatever.
The social integration features provided a silly little challenge – be at the top of the leaderboard each week. Pete Spindley would occasionally set a decent target for me to beat, and one time it took a lot of coins for a lot of boosts to overhaul the 1.1M he’d scored.
A few weeks ago I noticed that I’d hit the highest level – 182. I was also pretty near to 10M coins, and close to maxing out all of the score categories.

It didn’t take long to hit 10M coins (I have ever bought any coins),

and then I kept spending on boosts until I’d maxed out all of the score categories:

The 450ks were the hardest to get – it’s relatively easy to score over 500k, and much harder to get over 450k but beneath 500k.
With that final challenge behind me I’m now done with Bejeweled Blitz – there’s no further challenge remaining.
Onwards to 2048.
Filed under: wibble | Leave a Comment
Tags: Bejeweled Blitz, games, gaming
Review – Fujitsu ScanSnap iX500
TL;DR
This is the best gadget I’ve bought in ages. It’s quick, fuss free, and comes with an excellent software bundle.

Background
I’ve had a bunch of flatbed scanners over the years. Earlier ones succumbed to a lack of driver support as I upgraded my desktop OS, but I’ve been using a CanoScan N670U for over a decade now using the excellent VueScan to get around the lack of drivers for Windows 7 and 8[1]. It’s been fine for doing receipts for end of month expense reports, but it’s not the tool I need to go paperless. The 2 drawer filing cabinet in my office has been steadily overflowing to a 4 drawer filing cabinet in my garage – and that’s started to fill up.
I also had a brief flirtation with using a Genius business card scanner. For a short while my wife and kids found it great fun to feed cards into the little machine, but eventually the novelty wore off, and the unscanned business cards piled up in my office.
Seth Rogers put me on to the iX500. He’s a bit of a gadget freak, and it’s rare to see him so enthused about something as simple as a scanner.
Buying
When I started looking to buy an iX500 the spread between US pricing and UK pricing was ridiculous, so I bought mine on a recent US trip, taking advantage of Walmart’s ship to store system (which combined with PayPal payments didn’t have any issues for non US residents). Since then the pricing at home has dropped substantially, with the base model now £362.95 on Amazon (which is pretty much just the VAT premium over US price).
Deluxe?
I got the Deluxe bundle, which comes with an additional piece of software – Rack2-Filer Smart.
If you’re a Mac user then don’t bother, as Rack2-Filer is Windows only.
I’ve yet to be convinced of the value of Rack2-Filer. Even with OCR enabled on my scans I’m unable to search stuff, which means I’m probably doing something wrong, and that it’s not very good software, because it’s so easily letting me go wrong.
Worth the extra over the S1300i?
I considered buying the smaller S1300i. When I first looked on Walmart they didn’t have the iX500, and the smaller scanner would be easier to bring home. I held out for the iX500 because of its larger sheet feeder, which I think will be essential when it comes to working back through those filing cabinets.
In use
Put stuff in the sheet feeder, press the button, scanning is super fast, then choose the application to send the scan to.
I scanned 1500 business cards a few evenings ago, and the hardest part was feeding new ones in at sufficient speed (and keeping the output tray clear).
The software bundle
The iX500 hardware might be impressive, but it’s the software bundle that makes it useful.
ScanSnap manager
This is the app that gets activated when the scan button is pressed, and it’s there to enable routing of the scans to other applications. It’s smart enough to recommend CardMinder when the scan is business card sized.
Scan to folder
The default format appears to be PDF, which can be saved straight to a folder. The bundle also includes a full copy of Acrobat standard, and optical character recognition (OCR) can be enabled. OCR takes a couple of seconds after scanning is complete, but on a fast machine it’s fast enough to be a non issue.
Scan to picture folder
This converts the PDF to a JPEG and saves it to a different folder.
ABBYY OCR
The OCR engine comes from ABBYY, and once installed offers the option to convert directly into Microsoft Office documents.
Evernote
The desktop version of Evernote is supplied, but I found that I needed to update straight away to a more recent version. I’ve not used Evernote in the past, and it seems to need more permissions on Android than any app I’ve ever seen, so I’m not yet bought into that ecosystem.
Cloud storage
Scans can be sent straight to Google Drive, DropBox and Salesforce Chatter.
CardMinder
This shows a scan of both sides of a business card alongside OCRed fields for name, company, address etc. I’ve not yet explored merging the output into my Google contacts (and may not bother – it’s nice to know that I have the card scans there and searchable on my desktop/laptop)
Mobile devices
If the ScanSnap manager isn’t running on a USB attached computer then scans can be sent to other devices over WiFi. Software is available for iOS and Android, and seems to work well – though I can barely see the point of this feature.
Oversized documents
For a real challenge I tried scanning in a panoramic school photo. This caused me to discover the large document mode (press and hold the scan button rather than just press it).
The scanner also comes with a carrier sheet to handle transparencies and A3 sheets – I’ve not tried it yet.
Conclusion
I’m very happy with the iX500, and it’s already changed my home office workflow – stuff come in the mail, goes through the scanner and into recycling/shredder as appropriate. Recommended.
Note
[1] I consider it was worth every penny of the $79.95 license for professional edition to get off the wasteful treadmill of buying new scanners whenever driver support expired.
Filed under: review | 8 Comments
Tags: business cards, Fujitsu, iX500, PDF, review, scanner, ScanSnap
Cheap HDMI to VGA adaptor
When Paul Simmonds showed up to speak at the privacy and security track I hosted at QCon London last week he brought a Chromebook. After my own experiences using a Chromebook for a presentation my first thought was ‘this isn’t going to end well'[1].
The first issue was connecting to the ubiquitous VGA connector for the meeting room projector. Paul had a newer Chromebook than mine, but it still only had an HDMI output for video. He pulled out a nifty little adaptor:

It worked perfectly.
Paul kindly sent me a link to the eBay seller he used – the adaptors are just £4.99.
8 days later mine arrived from Hong Kong. I’m pleased to confirm that it works with my ARM Chromebook.
I’m even more pleased to confirm that it also works with the Raspberry Pi. Last time I looked at HDMI-VGA adaptors for the RPi they were £35, which is more than the cost of the RPi itself. Less than a fiver for an adaptor to use older monitors is certainly much more reasonable.
Sadly it doesn’t work with the HDMI adaptor I got for my 2013 Nexus 7 (even with a charger plugged in), but I always thought that would be something of a long shot.
Note
[1] We’d already had a hiccup at the start of the day with Caspar Bowden’s ThinkPad refusing to stay switched on (due to suspected overheating problems, which just might be cured with a fresh application of thermal compound to the CPU/heatsink – but that wasn’t happening live on stage).
Filed under: Raspberry Pi, review, technology | 1 Comment
Tags: adaptor, Chromebook, converter, HDMI, Raspberry Pi, RPi, VGA
Update (14 Mar 2014) Andrew Weir pointed out that I the price is per month not per year – corrected accordingly.
The big news of the last day is that Google dropped its pricing for Drive storage to $9.99 per TB per month. Ex Googler Sam Johnston says ‘So the price of storage is now basically free…’:

It’s a good point. Buying a TB of storage in a good old fashioned hard disk will cost me about $43 at today’s prices before I consider putting it in a server, powering it on or any redundancy.
My colleague Ryan points out that the real costs in the data centre come from memory and bandwidth, and I follow up with a point about IOPS:

If I buy a TB on Google Compute Engine (GCE) then I’ll pay $40/month – 4x as much. The reason it’s more expensive is that the GCE storage comes with a reasonably generous 300 IOPS allowance.
- Having storage is approximately free – lots of TB/$.
- Using storage costs money – limited IOPS/$
- Getting stuff onto and off of the service hosting storage also costs money – limited GB/$.
The reasons why cloud storage providers can offer large chunks of space for comparatively little money are twofold:
- People don’t use it – the moment I pass 100GB of stuff on all of my Google services I need to pay $9.99 rather than $1.99, so for most people the cost is closer to $99.90 per TB per month e.g. the vast majority of people on the 1TB subscription tier will have just a bit more than 100GB of stuff on the service.
- People don’t use it very much – most of the stuff on cloud storage services is there for archive purposes – photos you want to keep forever, files you might just need one day. It’s not worth our time to clean stuff up, so keep everything just in case. The active subset of files in use on a daily basis is tiny – something that the pedallers of hierarchical storage management (HSM) have known for years.
There’s also a practical consideration in terms of using those storage services – it takes a very long time to upload 1TB even over a modern connection. A quick calculation suggests it would take me 7 months driving my (fibre to the cabinet) broadband connection 24×7 to upload a TB of stuff.
The key word in the points above is People. Our capacity as individuals to use large quantities of storage is pretty limited.
Of course it’s different with machines, because my server in the cloud might be used by thousands of people, or it might be moving tons of files around just munging them from one data representation to another, or it might be harvesting data from all over the place. Servers can consume huge quantities of IOPS (without necessarily consuming huge quantities of storage), as I’ve proved to myself a number of times by breaking cloud servers by IO starvation.
For anybody thinking that they can just mount their Google Drive onto their cloud server just try… It kinda works – in that you can copy stuff backwards and forwards, but it kinda doesn’t – the performance sucks.
My cloud servers need their IOPS, but my cloud storage service really doesn’t – and that’s why data at rest is free, and data in motion costs money.
Filed under: cloud, technology | 1 Comment
Tags: cloud, cost, Drive, free, GCE, google, IOPS, performance, storage
Docker memory profiling
Not long after my friend and colleague Leslie Muller created his first virtual machine manager[1] we came to a realisation that the primary resource constraint was RAM (rather than CPU or storage). Virtual machines can quickly consume giant quantities of RAM, and that’s what we ended up carving up the underlying hardware by.
Apparently the Googlers came to a similar conclusion. I heard Derek Collison[2] at QCon London last week telling his story of projects within Google being billed by their RAM consumption.
I think RAM consumption will end up being very important in the ongoing ‘VMs or containers?’ debate. The answer to that debate is of course both, but the operational decision to choose one or the other may be largely driven by RAM considerations.
I did some casual testing using my latest (0.6.0) Node-Red image…
On Docker
I ran ‘free’ before and after spinning up 3 containers based on the image:
- 138204 used – no container
- 179816 used – first container added (+41M)
- 203252 used – second container added (+23M)
- 226276 used – third container added (+22M)
The incremental hit for adding more containers that do the same thing is pretty small.
It’s worth looking at what size of VM I’d need for this. Before I even started I was using over 128M, so I’d need at least a 256M VM (assuming the usual binary size increments). If I put every Node-Red into a distinct VM then I’m using 256M each time, but incremental containers are costing only 23M – an order of magnitude better[3].
Without Docker
It’s also worth looking at a base case without using Docker. I built a fresh Ubuntu 12.04.4 VM and installed Node-Red three times on it[4] and started up each in turn:
- 80136 used – before starting Node-Red
- 114160 used – first instance started (+33M)
- 138372 used – second instance started (+24M)
- 162592 used – third instance started (+24M)
There’s a lower up front cost of running the first instance (because there’s no Docker overhead), but things are about the same for subsequent instances. After decades of engineering operating systems are good at multi tenancy – who knew?
So what?
None of this is news, so what’s the point?
The point is that isolation by containers is cheaper than isolation by virtual machines. This is why KVM based VPSes cost about twice as much as similarly sized OpenVZ based VPSes (just take a look at LowEndBox[5]). It’s cheaper because it uses less of that precious RAM.
2x cheaper is fine when it comes to arbitrary workloads, but we can probably get to 10x cheaper when it comes to specific applications. Imagine a world where the Docker public index becomes the basis for a service provider application store. Those service providers will be able to achieve enormous economies of scope and scale for popular applications, and that’s what’s going to be disruptive.
Notes:
[1] What’s now VMware’s vCloud Automation Center (vCAC), and was for a while Dynamic Ops Virtual Resource Manager (VRM) started life as an in house project called Virtual Developer Environment (VDE).
[2] At some stage that link will have a video of Derek’s presentation, and also a video of an interview I did with him.
[3] It’s at this point that anybody in the room from VMware starts throwing peanuts, and pointing out that their hypervisor can take advantage of the fact that each of those VMs has many memory blocks in common – so they can be overcommitted onto physical hardware. The tightrope of hardware and facilities costs versus software licensing costs seems to be one that the enterprise is walking, and the hosting market is mostly avoiding.
[4] NPM was smart enough to realise that most of the work had already been done for installations 2 & 3, so they were very quick, and didn’t use much more disk.
[5] How I wish they had an easy comparison matrix for size/type/location.
Filed under: Docker | 1 Comment
Tags: applications, Docker, hosting, KVM, memory, OpenVZ, RAM, VPS
Banking on Ubuntu
TL;DR
Banking CIOs may know about Ubuntu, and be vaguely aware of Canonical, but I’d be surprised if many could explain the difference in commerials versus Red Hat. Meanwhile engineering teams are content to stick with what they have in a combination of clinging to the past and seeking some mythical homogeneity. OpenStack might give Canonical the break out opportunity it’s been waiting for, but it’s a risky bet given the parlous state of that project (and some smart recent game play by Red Hat).
Background
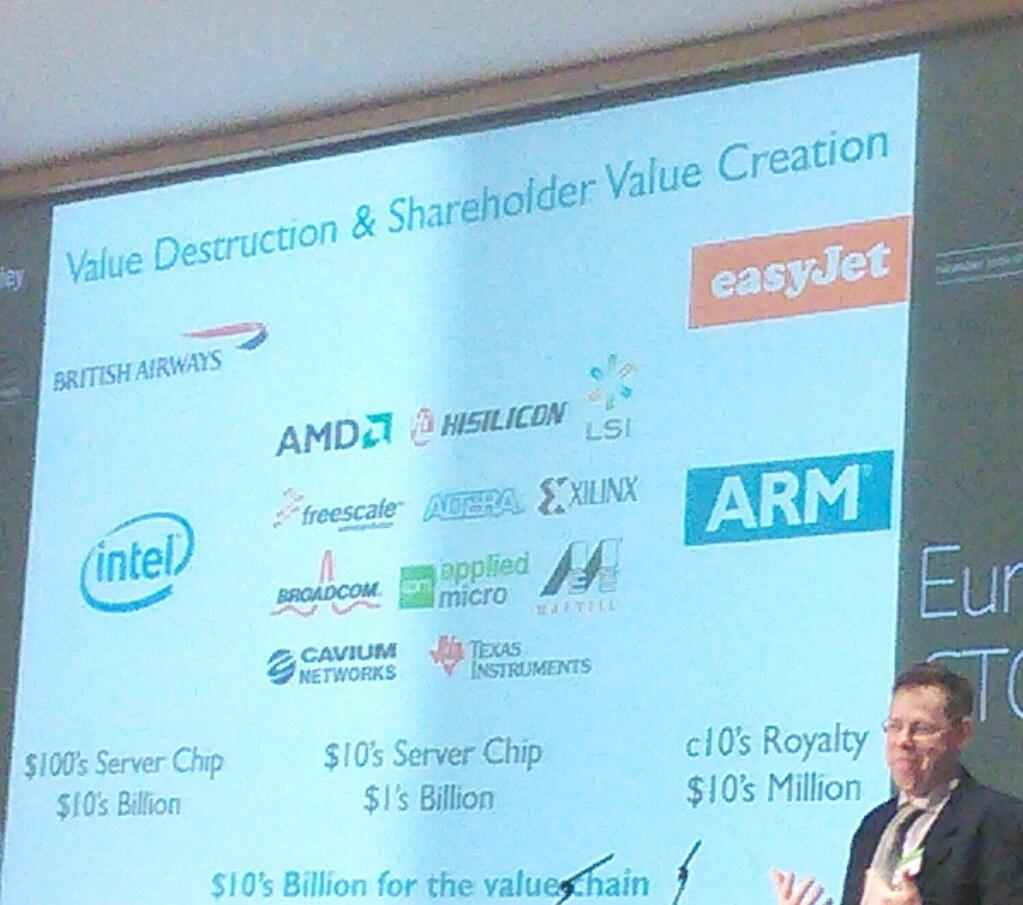
It’s coming up on a year since I left the world of banking to join CohesiveFT, but I took a trip back to my old world to attend a banking CTO conference last week. One of the speakers was Mark Shuttleworth from Canonical, which got me thinking about (the lack of) adoption of Ubuntu in financial services.
My personal experience of Ubuntu
I switched to Ubuntu myself about 5 years ago. I’d been a relatively early adopter of Red Hat back in 1996, but when it came to doing stuff in the cloud everybody was using Ubuntu, and I could see why – it was easy and it worked. These days I reach for the latest Ubuntu LTS as first choice whenever I need a Linux box or VM. Ubuntu is also the basis of what we do at CohesiveFT.
It was a little later, when I got to know Simon Wardley (who worked for Canonical at the time), that I learned of Canonical’s different approach to monetising Linux and related open source. This seemed like a way to deal with the myth of software support. It’s also a (somewhat) scale free approach, decoupling support costs from the size of deployments.
What Canonical are doing fits into what I’ve previously labelled ‘Internet Alchemy’ – a disruptive move that turns somebody else’s pile of gold into their pile of nickels. In their recent book ‘The Second Machine Age‘ Andrew McAfee and Erik Brynjolfsson refer to this as analogue dolars turning into digital pennies – it’s not a perfect analogy for disruption of one generation of IT for another, but it fits. At the same event ARM’s CTO Mike Muller made similar observations. The key point is how much value gets put back into consumer surplus:
Linux at banks
Linux started to find its way onto unofficial boxes under desks around 2000 (I had one), and found its way onto production systems a few years later. x86 hardware became too compelling from a performance/price point of view, but many teams didn’t want Windows. Red Hat stepped into the void, and soon afterwards Enterprise Linux (EL) came along to be a slower moving target for adoption and support. It’s telling that Red Hat essentially owns the words ‘Enterprise Linux’.
Banks push systems harder than many other users, and I’ve seen Linux pushed to breaking point a number of times (with the thing that was breaking usually some I/O driver). That’s when support becomes crucial – especially when things are already in production. Red Hat cornered that support in two ways – firstly they signed up all of the banks adopting Linux as customers, and secondly they worked with all of the software vendors preferred by those banks to have RHEL as part of their official support matrix. There are essentially three reasons why banks pay for RHEL licenses:
- Support of the OS itself
- Near ubiquity of ISV support for the platform
- Open source indemnity
The top down sell
Linux was a reasonably easy top down sell because the hardware was so much cheaper than RISC based servers (even if they were bundled with their proprietary Unix flavours).
Today’s tech savvy CIO [1] will have heard of Ubuntu. They may even use it for personal stuff. They might just be aware of Canonical as the commercial vehicle behind Ubuntu, but it’s unlikely that they know the difference of approach versus Red Hat.
The top down problem is one of ignorance, and often a lack of access to deal with that ignorance.
Long term Canonical might be able to pull off a domino run – once one CIO adopts the others in the club follow. It’s likely to start with OpenStack environments running in house apps (that don’t get caught in the ISV support matrix).
The bottom up sell
The banks still have Unix (rather than Linux) engineering teams – in part because there’s a whole ton of proprietary Unix still in production. These guys create internal distros – taking stuff out that might be risky in the production environment, and putting stuff in that’s part of the enterprise operation scene (monitoring, security agents etc.). This becomes problematic with support, because ISVs claim that the banks aren’t really running RHEL when things go wrong.
A typical part of the *nix environment is that systems get pushed from golden sources on a frequent (daily) basis. Operations teams have gotten out of the business of managing snowflakes – but that’s been swapped for piste bashing, every slope is different, and they need to be groomed every day before start of play.
In his talk Mark frequently referred to Solaris as a label for the old world. The trouble is that early internal Linux builds were made to look like SunOS, because the Unix guys had stuck with that when Solaris came along. It’s only in recent years that a combination of skills issues (the new kids just didn’t grok SunOS) and ISV issues (where’s /opt?) have forced a refresh of builds to look something like a contemporary Linux.
The SunOS era guys are still in charge. They resisted Solaris when that came along. They resisted RHEL when that came along. Care to guess what they think of Ununtu? These aren’t the people writing white papers about how a switch to Canonical could save the company a ton of money.
Oneness
One thing that banking CIOs and Unix engineers can usually agree on is a fanatical zeal to have just one of everything. One type of hardware running one operating system using one sort of database etc.
Of course that’s not how things work out in real life. Corner cases creep in, exceptions are made, and heterogeneity takes hold. And this is what makes everything so expensive.
Two flavours of Linux == twice the engineering and support costs. Simple!
Even if Canonical Ubuntu is free then it’s not worth the effort to adopt it because RHEL will still be needed for all of the ISV stuff that depends on it.
Or so the story goes… I’ve been guilty myself in the past on this one – sticking with a proprietary full fat application server stack rather than embracing Tomcat for low end stuff. It did actually make economic sense for a while, but circumstances changed and it took too long to re-evaluate and reposition.
Does OpenStack change the game?
Maybe.
If OpenStack gets its act together[2] and really is the Linux of cloud then it’s exactly the opportunity that Canonical need – the driver of that re-evaluation and repositioning.
The Canonical support model of OpenStack is straightforward and seems both reasonable and fair (though I am left wondering why Mark has this stuff in his slides, but I can’t find it on the web to link to here?[3]).
It’s clear though that Red Hat aren’t being idle in the space. Their recent move with CentOS means that they have a free at the point of consumption route to market for their own flavour of OpenStack, with a licensed version there for those who feel the need to pay for support.
Notes
[1] Banking CIOs aren’t all technically illiterate – though that can be a problem. Many CIOs come from a software dev leadership background, but it’s (sadly too) fashionable to concentrate ‘on the business’ and ‘be a manager rather than a technologist’. The present trend in technology companies of having strongly technical (rather than sales) leadership hasn’t yet crossed over to financial services. The hard part is that technical skills get washed out – three years off the coal face might as well be a lifetime, as the industry and state of the art moves on.
[2] Right now that seems like a big if. Simon Wardley has the issues covered in The trouble with OpenStack, and I wrote myself recently about some of the quality issues and infighting amongst contributors.
[3] Perhaps part of Canonical’s problem with obscurity is that there’s no transparency on what they do charge for their services.
Filed under: technology | 1 Comment
Tags: banking, Canonical, cloud, EL, Linux, OpenStack, Red Hat, RHEL, Ubuntu
Update (13 Mar 2014) – this presentation is also available on YouTube
I did a presentation at the open source hardware users group (OSHUG) last night. Click to the second slide to get the TL;DR version:
With more time I’d like to get some quantitative material on the memory footprint of various cipher suites and key lengths in embedded environments (and also get a better measure of where hardware support can be used to help out).
The bottom line here is that low end hobbyist boards (like any 8bit Atmel based Arduinos) can’t really handle security protocols. This makes me worry that the Internet of Things is going to grow up without security in the first place, and then security bolted on afterwards.
All is not lost though. Systems with much better compute power and the ability to support a full secured stack aren’t any more expensive (at least in £ if not power) – a Raspberry Pi or Beaglebone Black typically costs less than an Arduino with network. Also Arduino is growing up… versions with much better ARM processors (and even Linux) are coming to market. So there’s still cause to be optimistic that *this time* security does get built in.
Filed under: Arduino, BeagleBone, presentation, Raspberry Pi, security | 1 Comment
Tags: arduino, ARM, BeagleBone, encryption, IPSEC, keys, Raspberry Pi, RPi, security, SSH, SSL, tls

